
I have been known to occasionally make some armor. The functional kind.
I participate in ‘heavy weapons’ in the Society of Creative Anachronism, which is meant to be similar to what one might experience if fighting with broadswords, or with pole weapons and spears. We don’t use real swords, but weapons made of rattan, but we do actually hit each other.
Armor is a necessity.
I emphasize that this isn’t real swordplay, but it’s fun nevertheless, and does include a few of the same skills and hazards. A person can get seriously hurt if they don’t practice safety.
The armor used in heavy weapons must be sufficient to protect its wearer from blows of a heavy rattan stick. There are some basic rules. Full-face helmets are required. The solar plexus and kidneys must be shielded. Knees and elbows must be sufficiently protected.
One nice thing about armor for the SCA, is that it needn’t be metal, but it does need to at least appear similar to period armor of the persona that the wearer plays. It turns out that the plastic from 55 or 35 gallon HDPE plastic drums is perfectly satisfactory. And, it’s significantly lighter than metal armor.
I have a source for 35 gallon HDPE drums, and a rudimentary workshop, so I’ve been working on some armor for myself. I thought I might show some parts of the process here.
In the summer, I can actually work on armor, because we can get the cars out of the garage.

I had gone into the garage to go for a bike ride. I wound up cutting parts for armor instead.
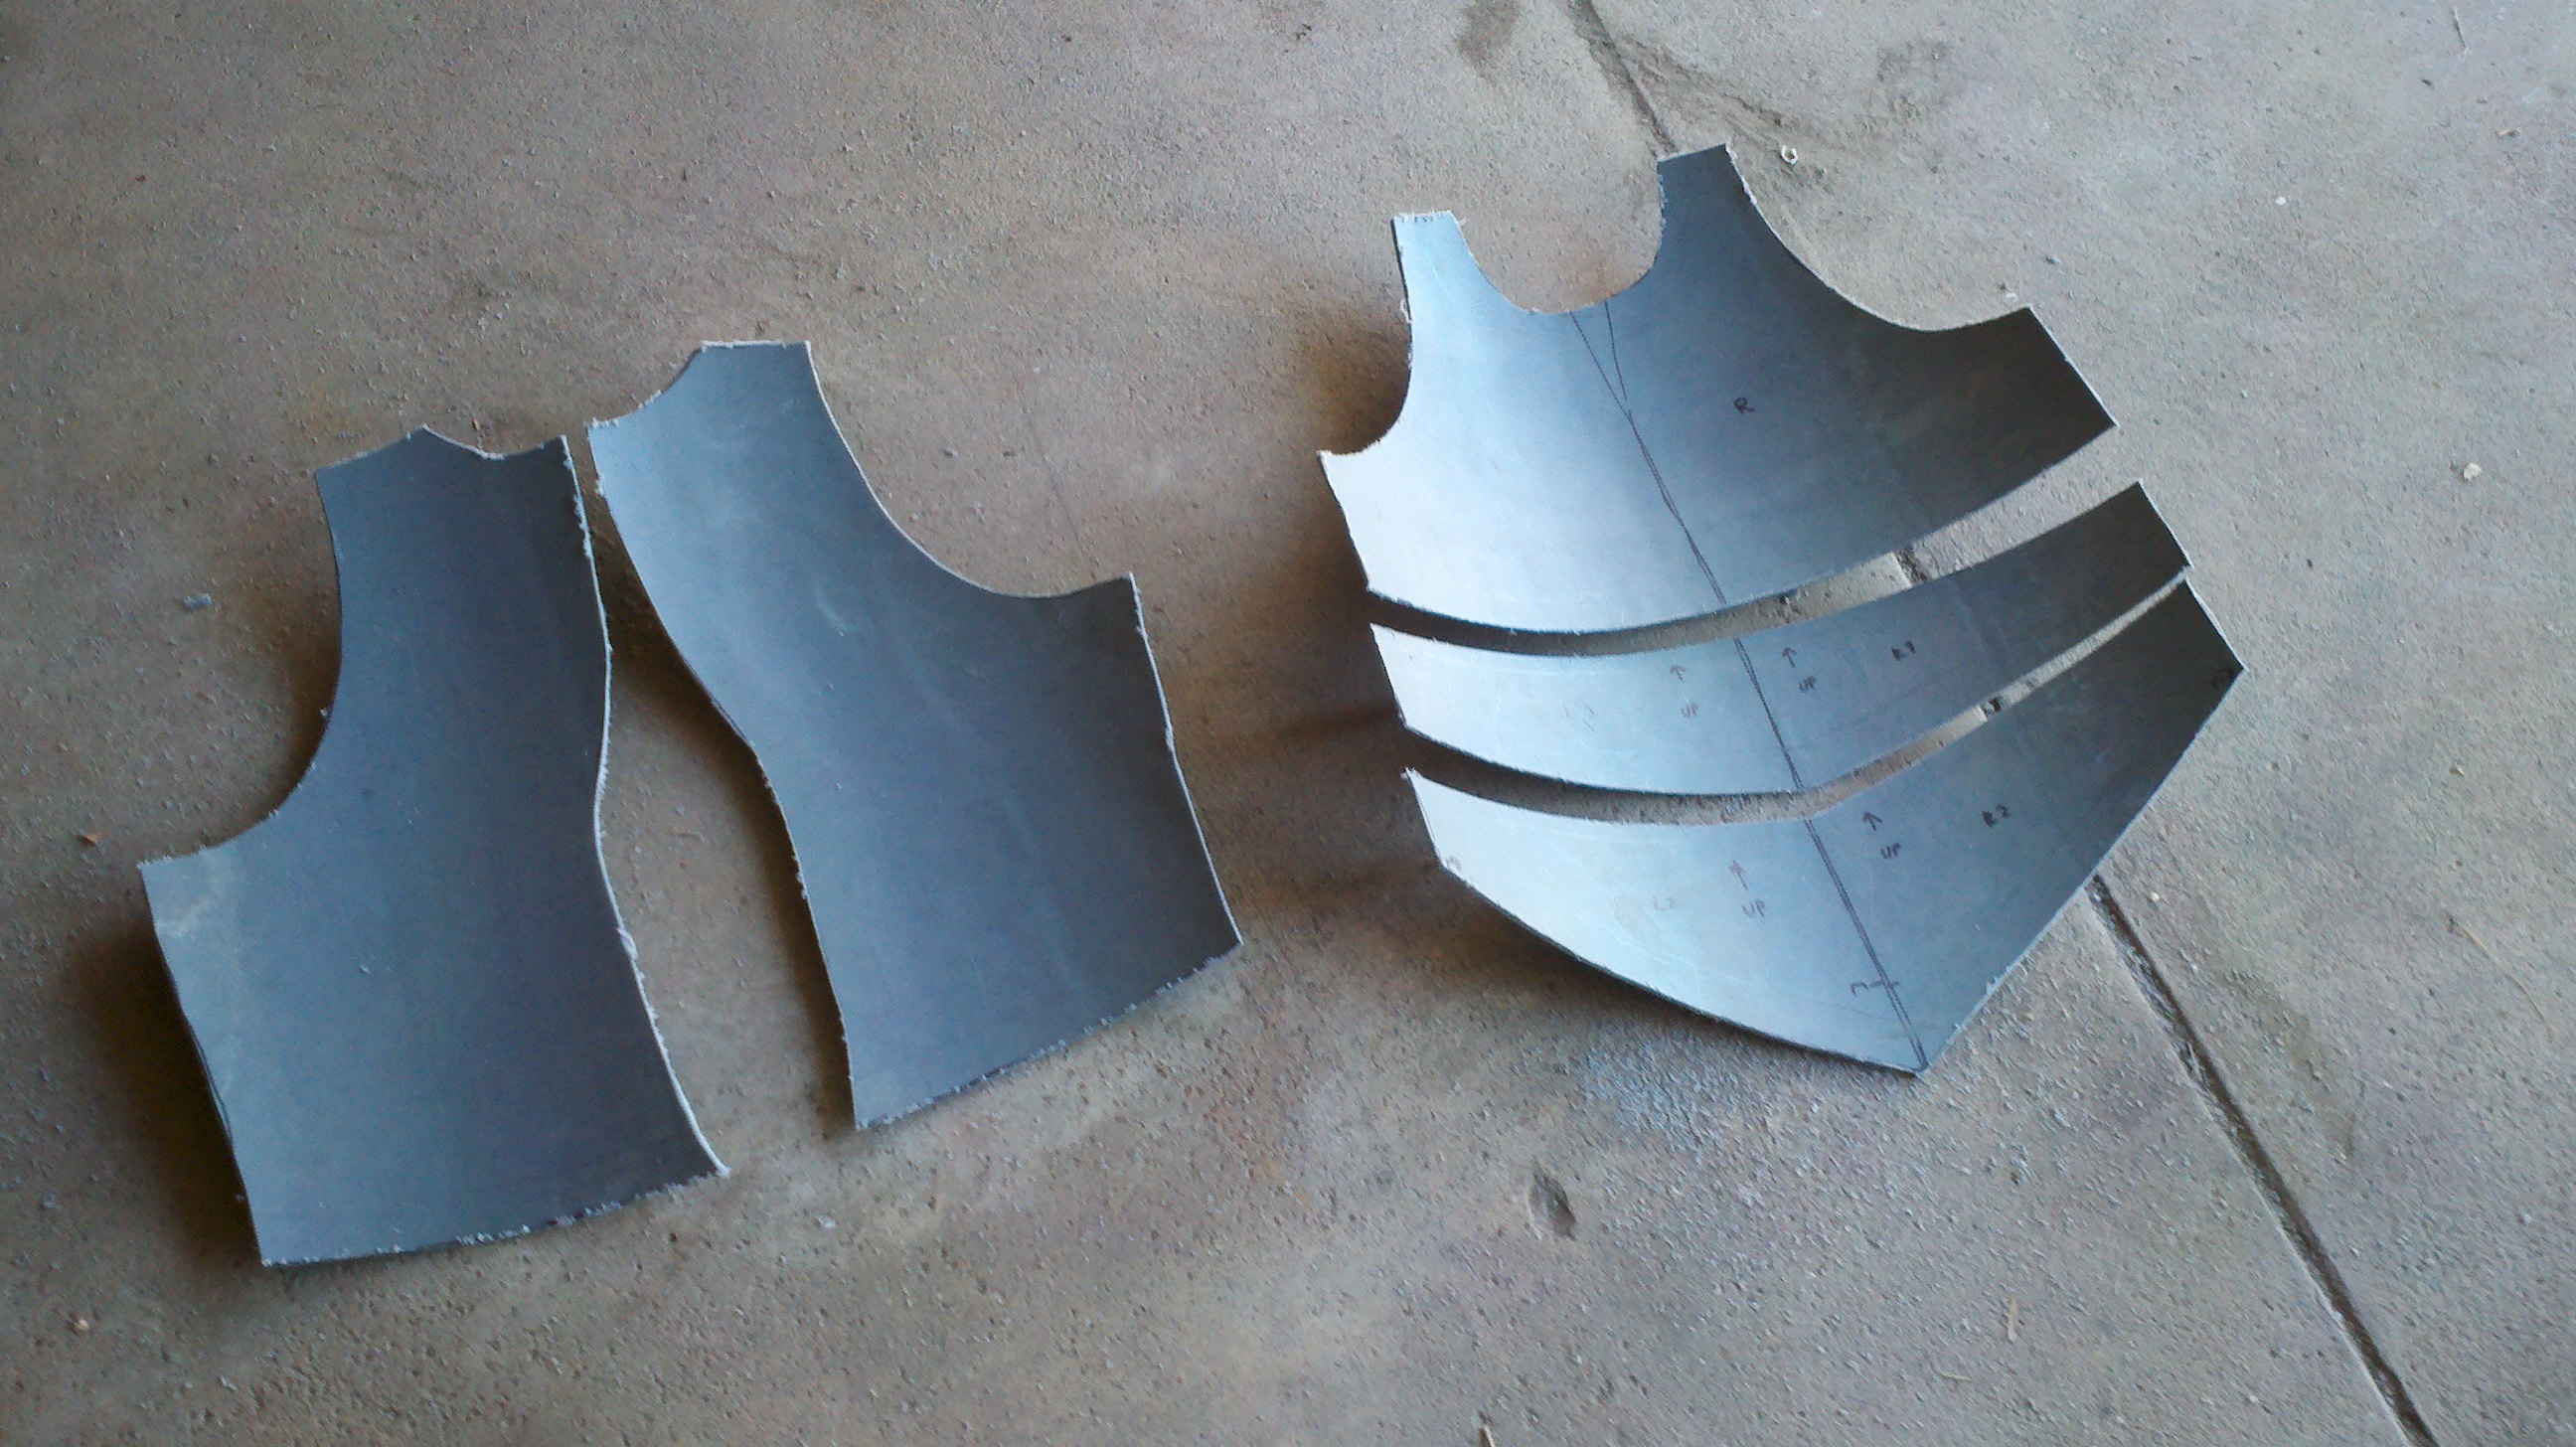
The nice thing about HDPE plastic is that you can heat and mold it at fairly low temperatures. Putting it in a pot of boiling water works. Or you can use the oven at about 200 degrees.
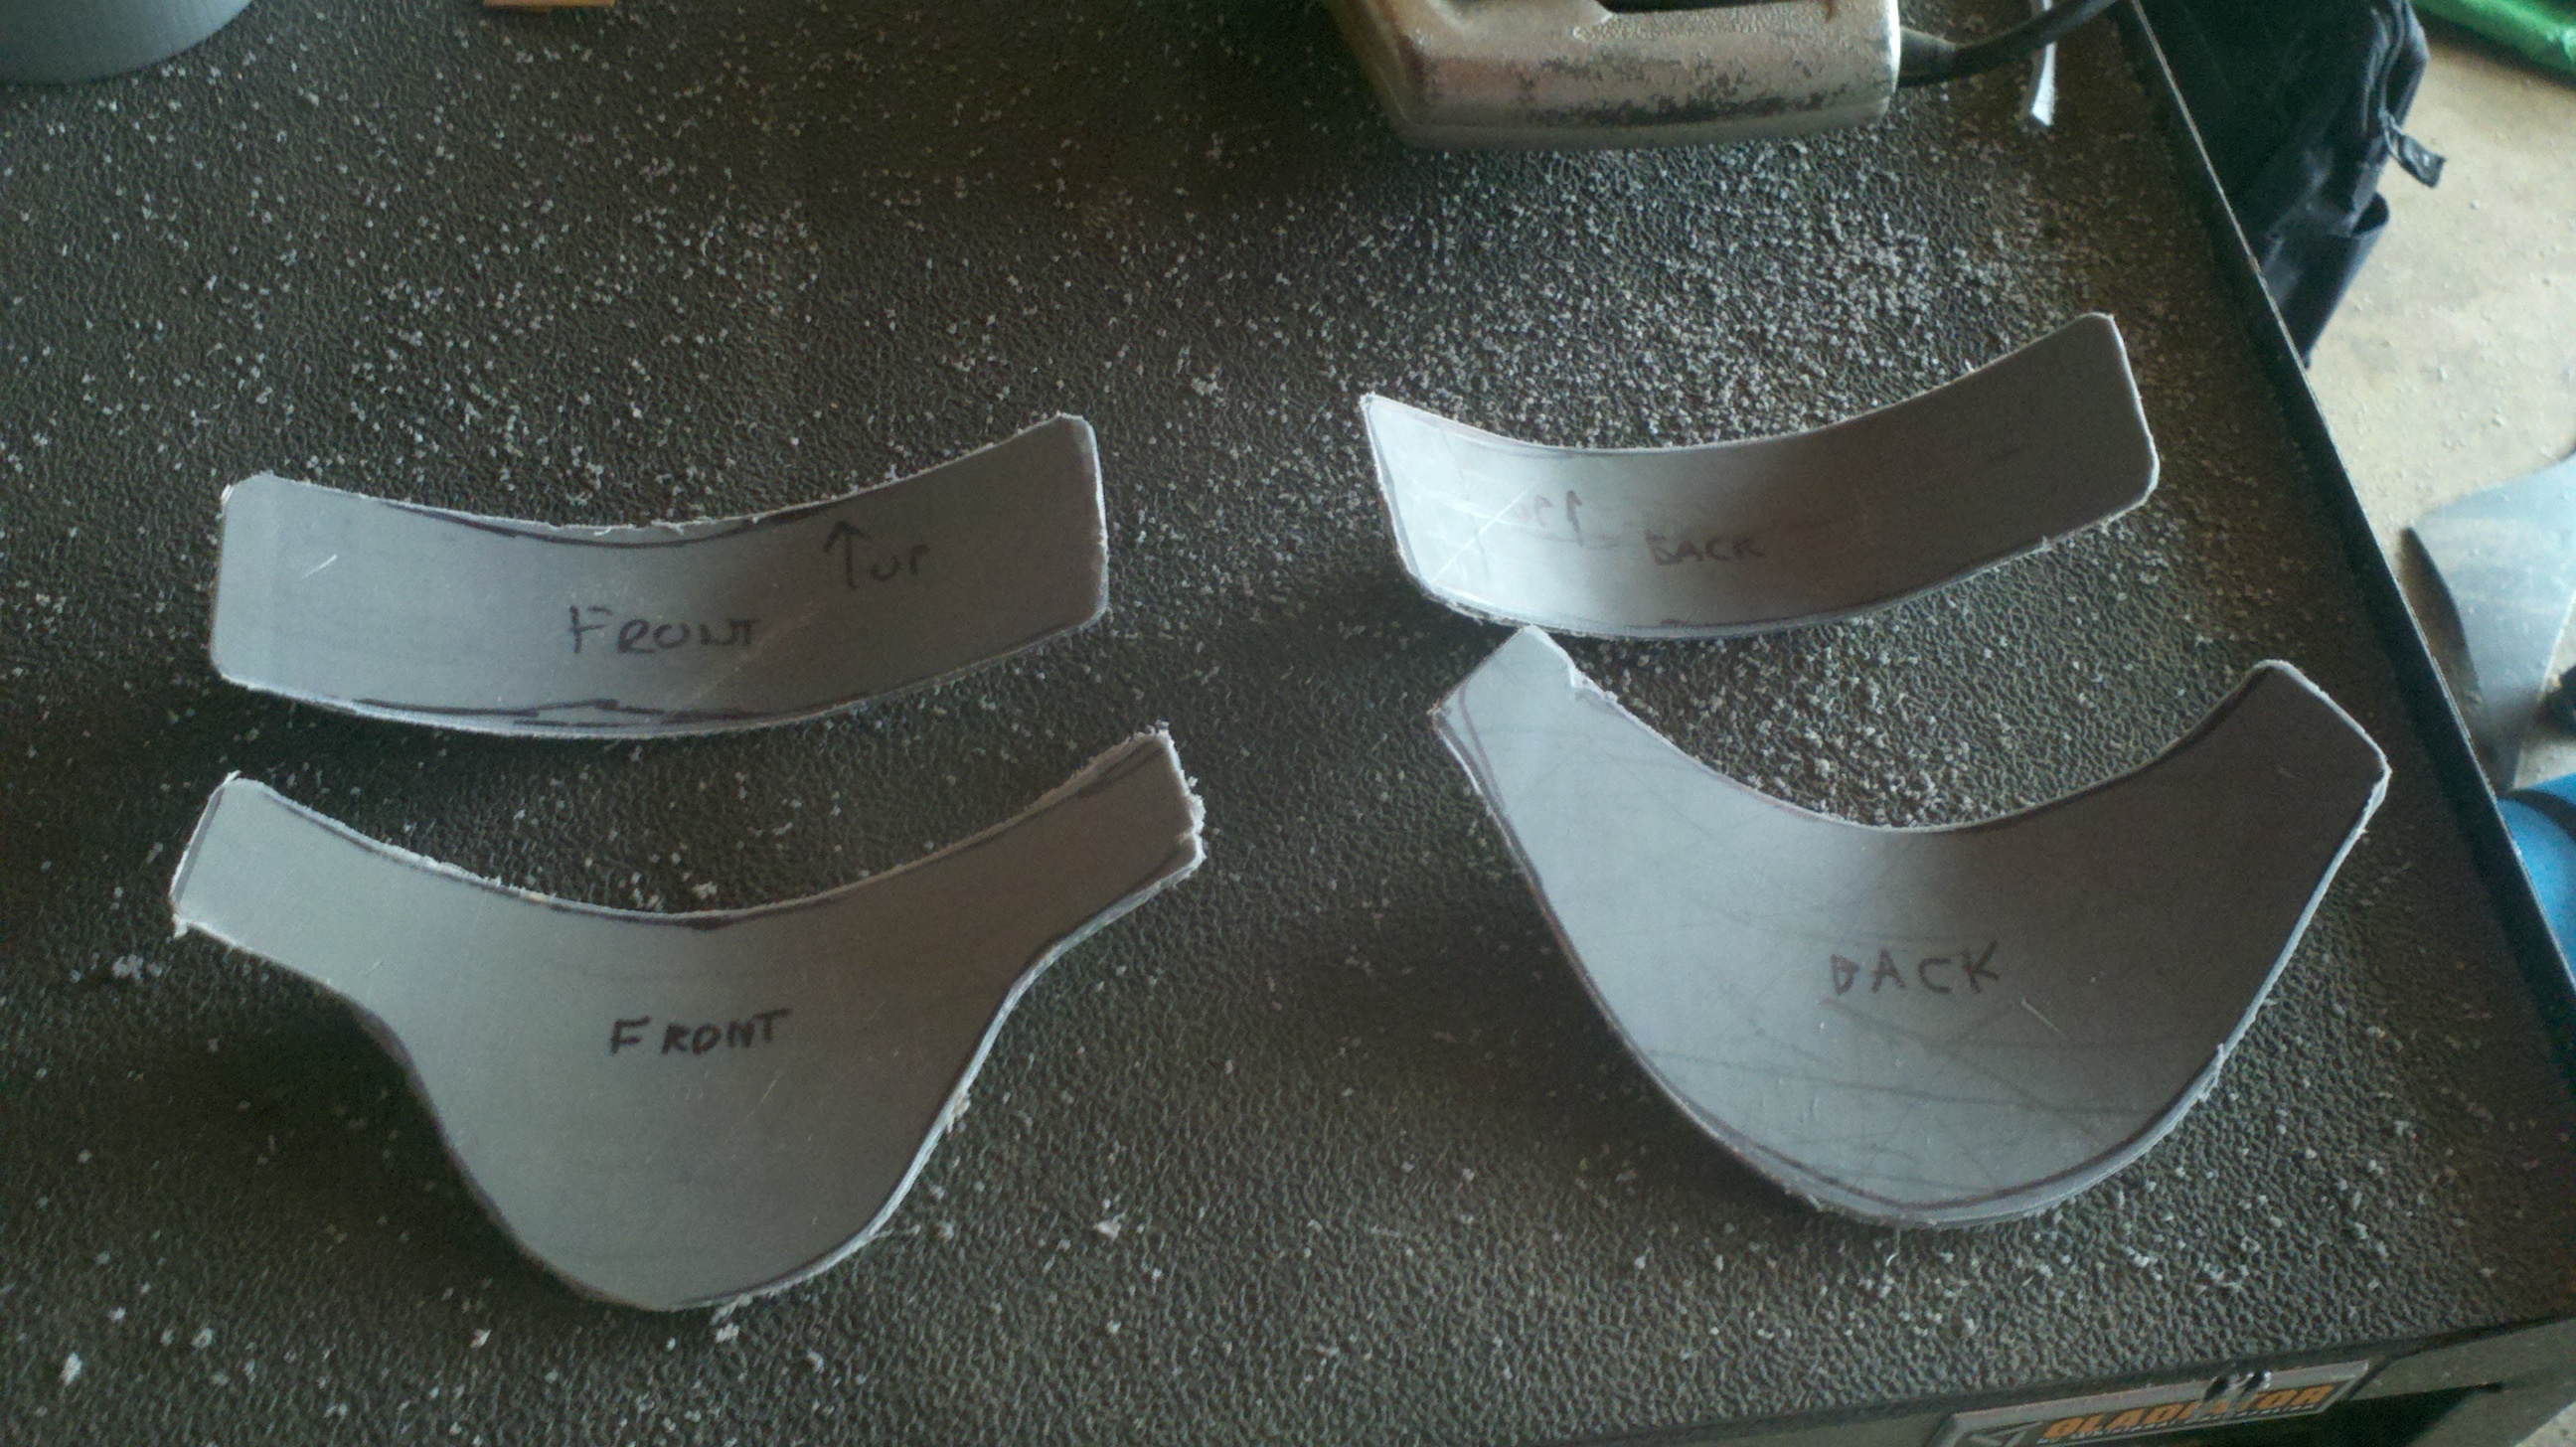
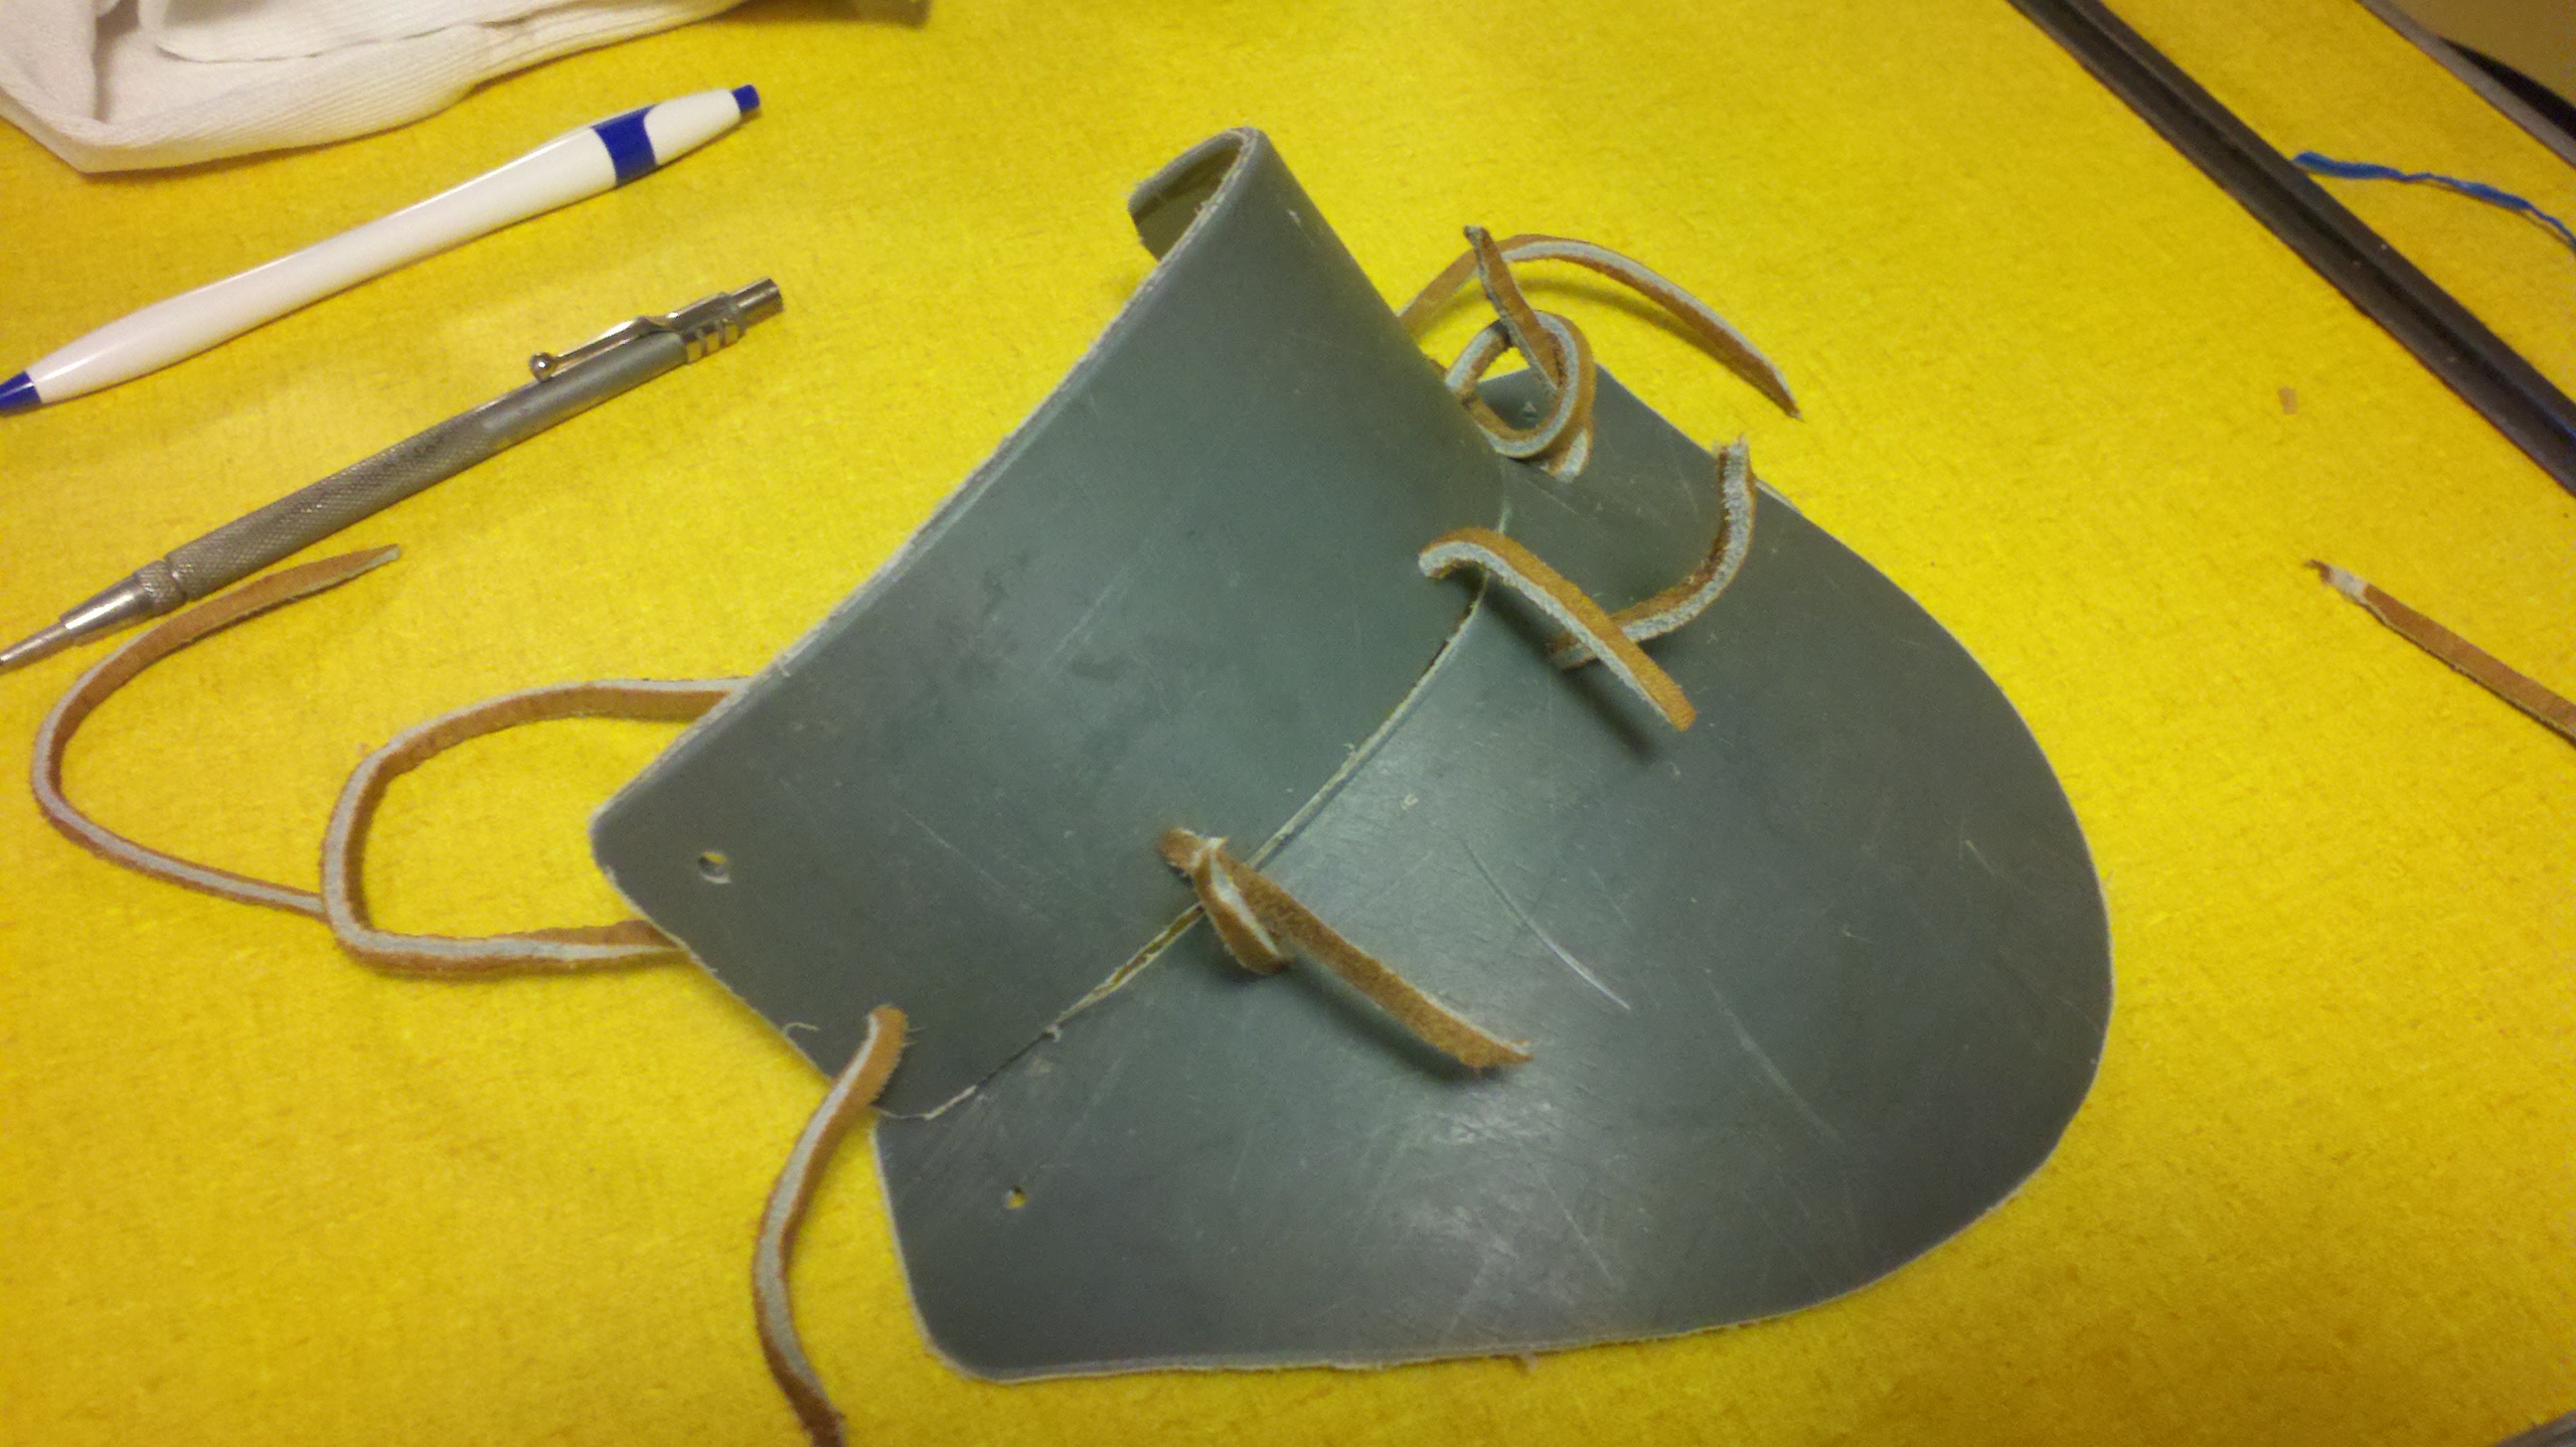
The pieces fit snugly together once the plastic is molded.
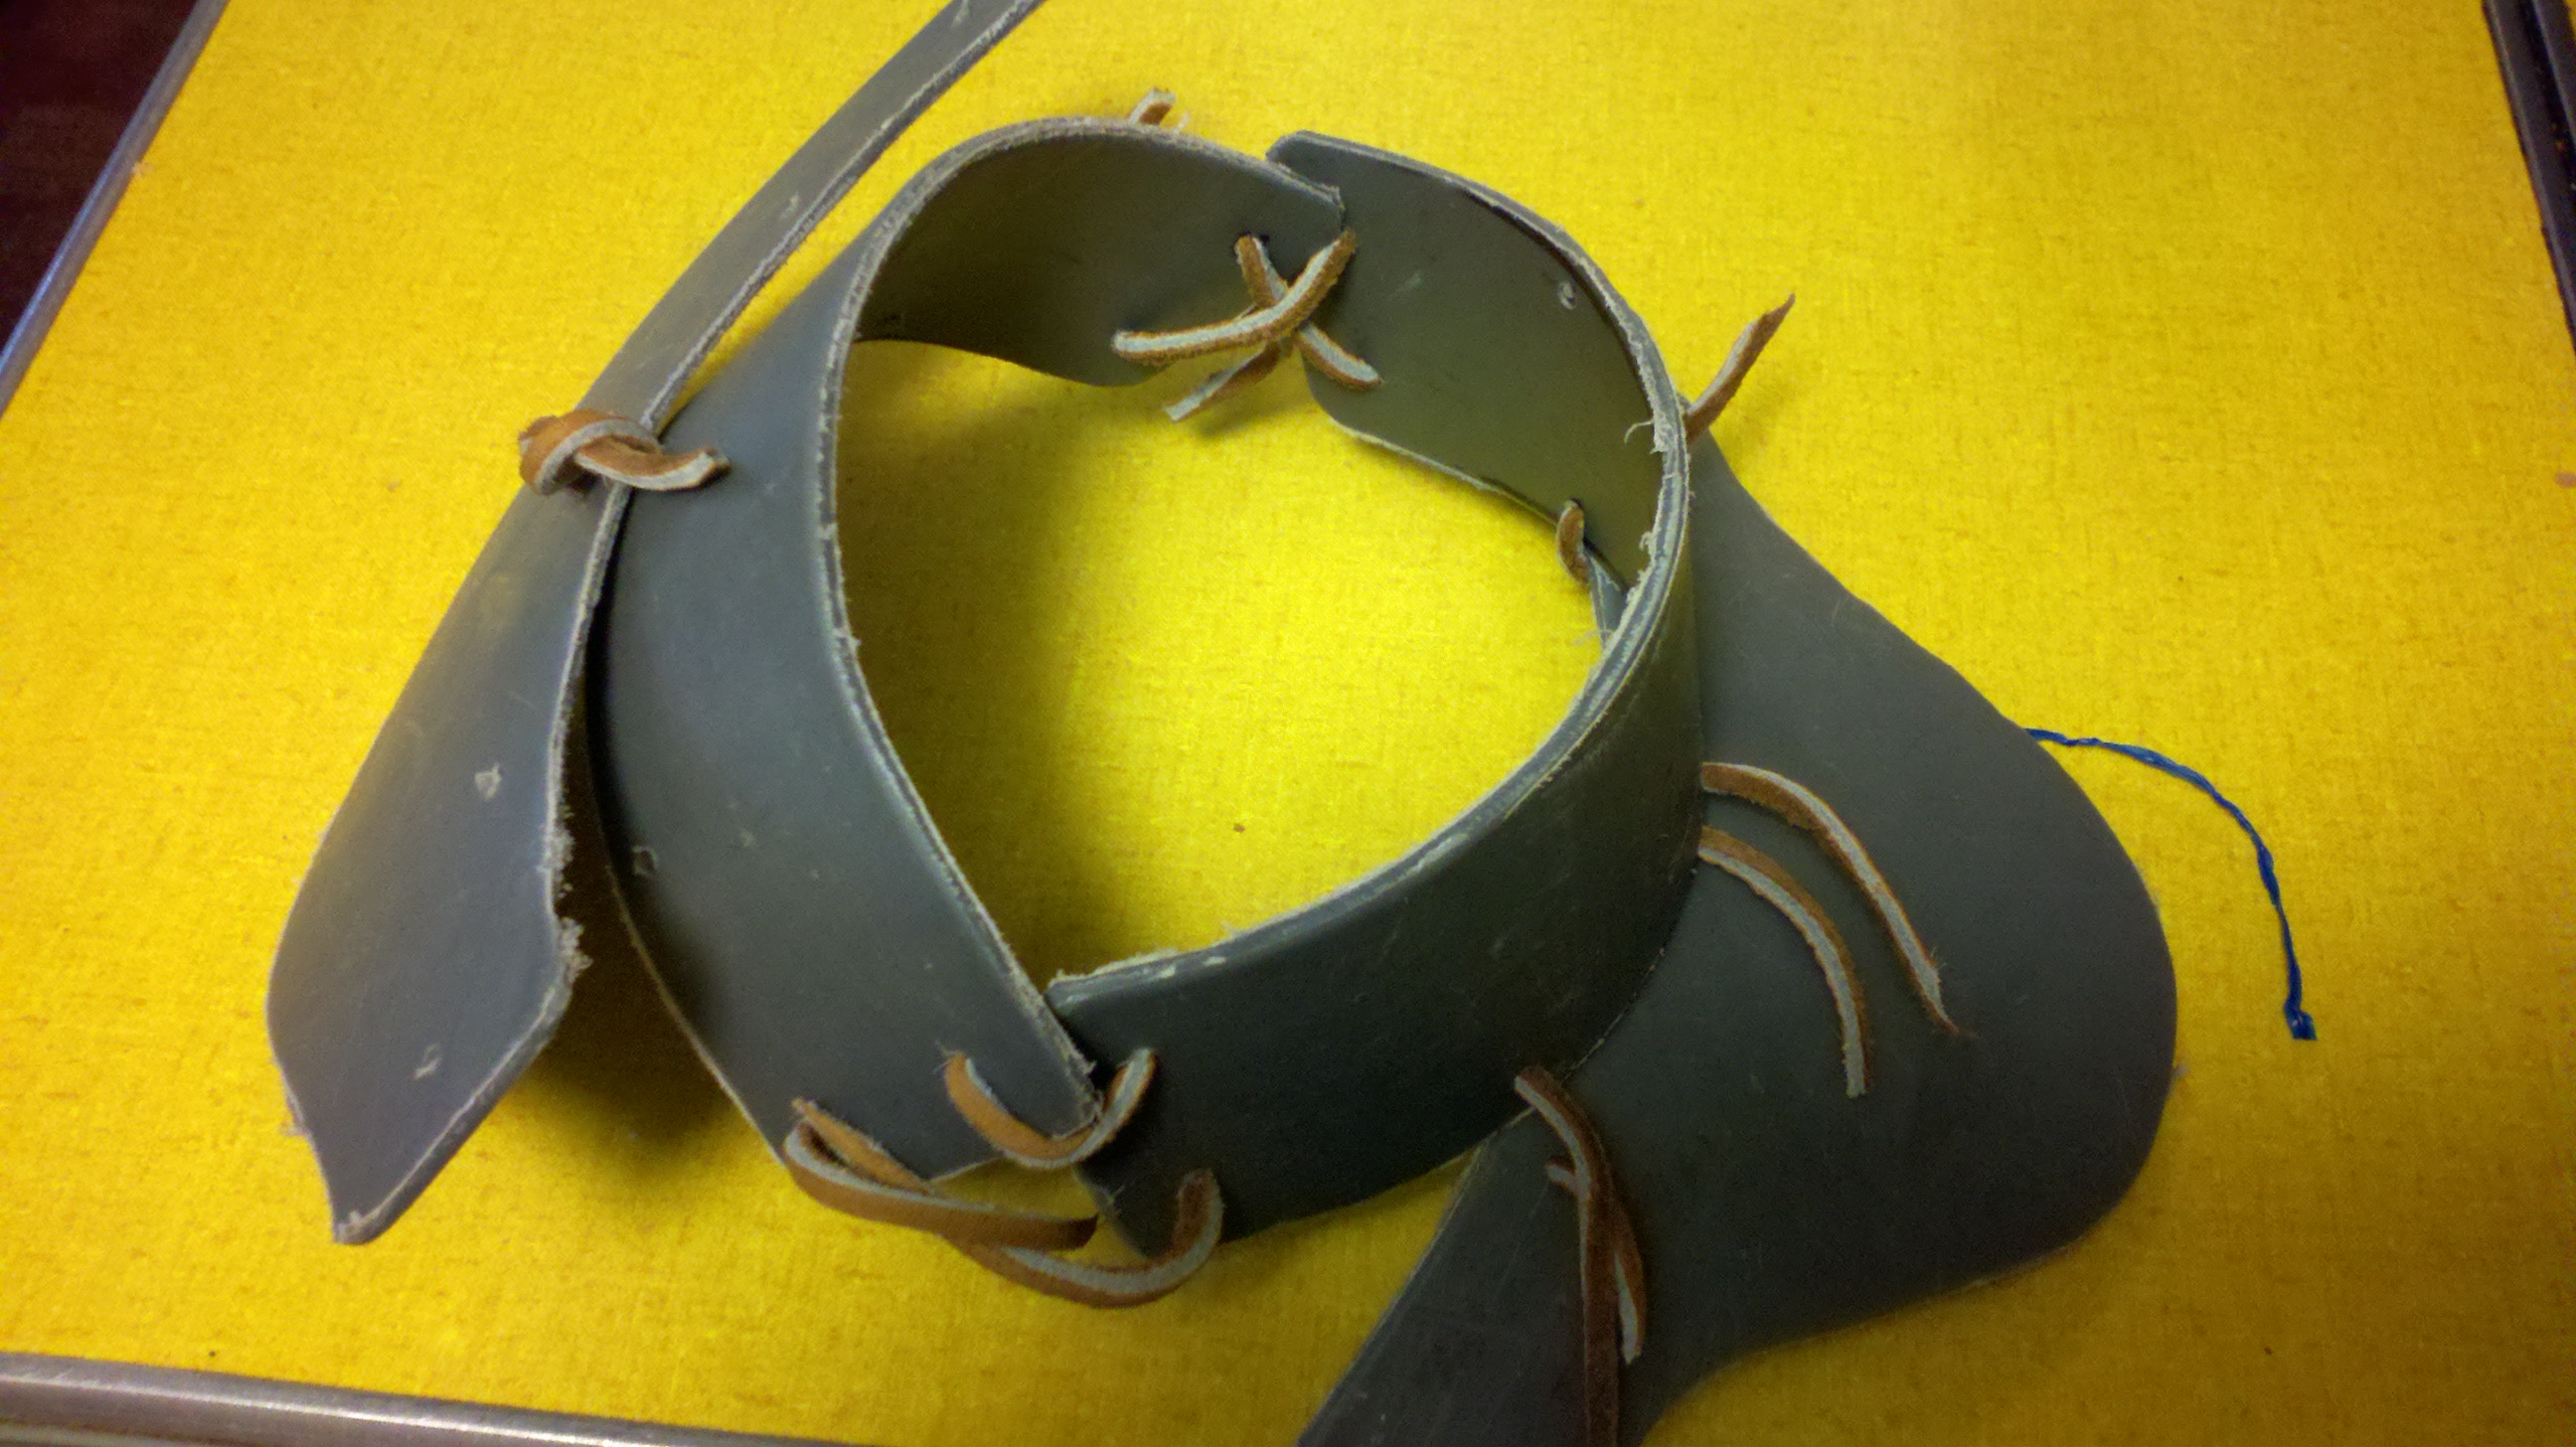
Me in my new gorget. My neck is not sufficiently protected from an unwanted blow.

Sometimes, inspiration strikes at strange moments. I had to sketch this late one night using a pad that I keep at my bedside.
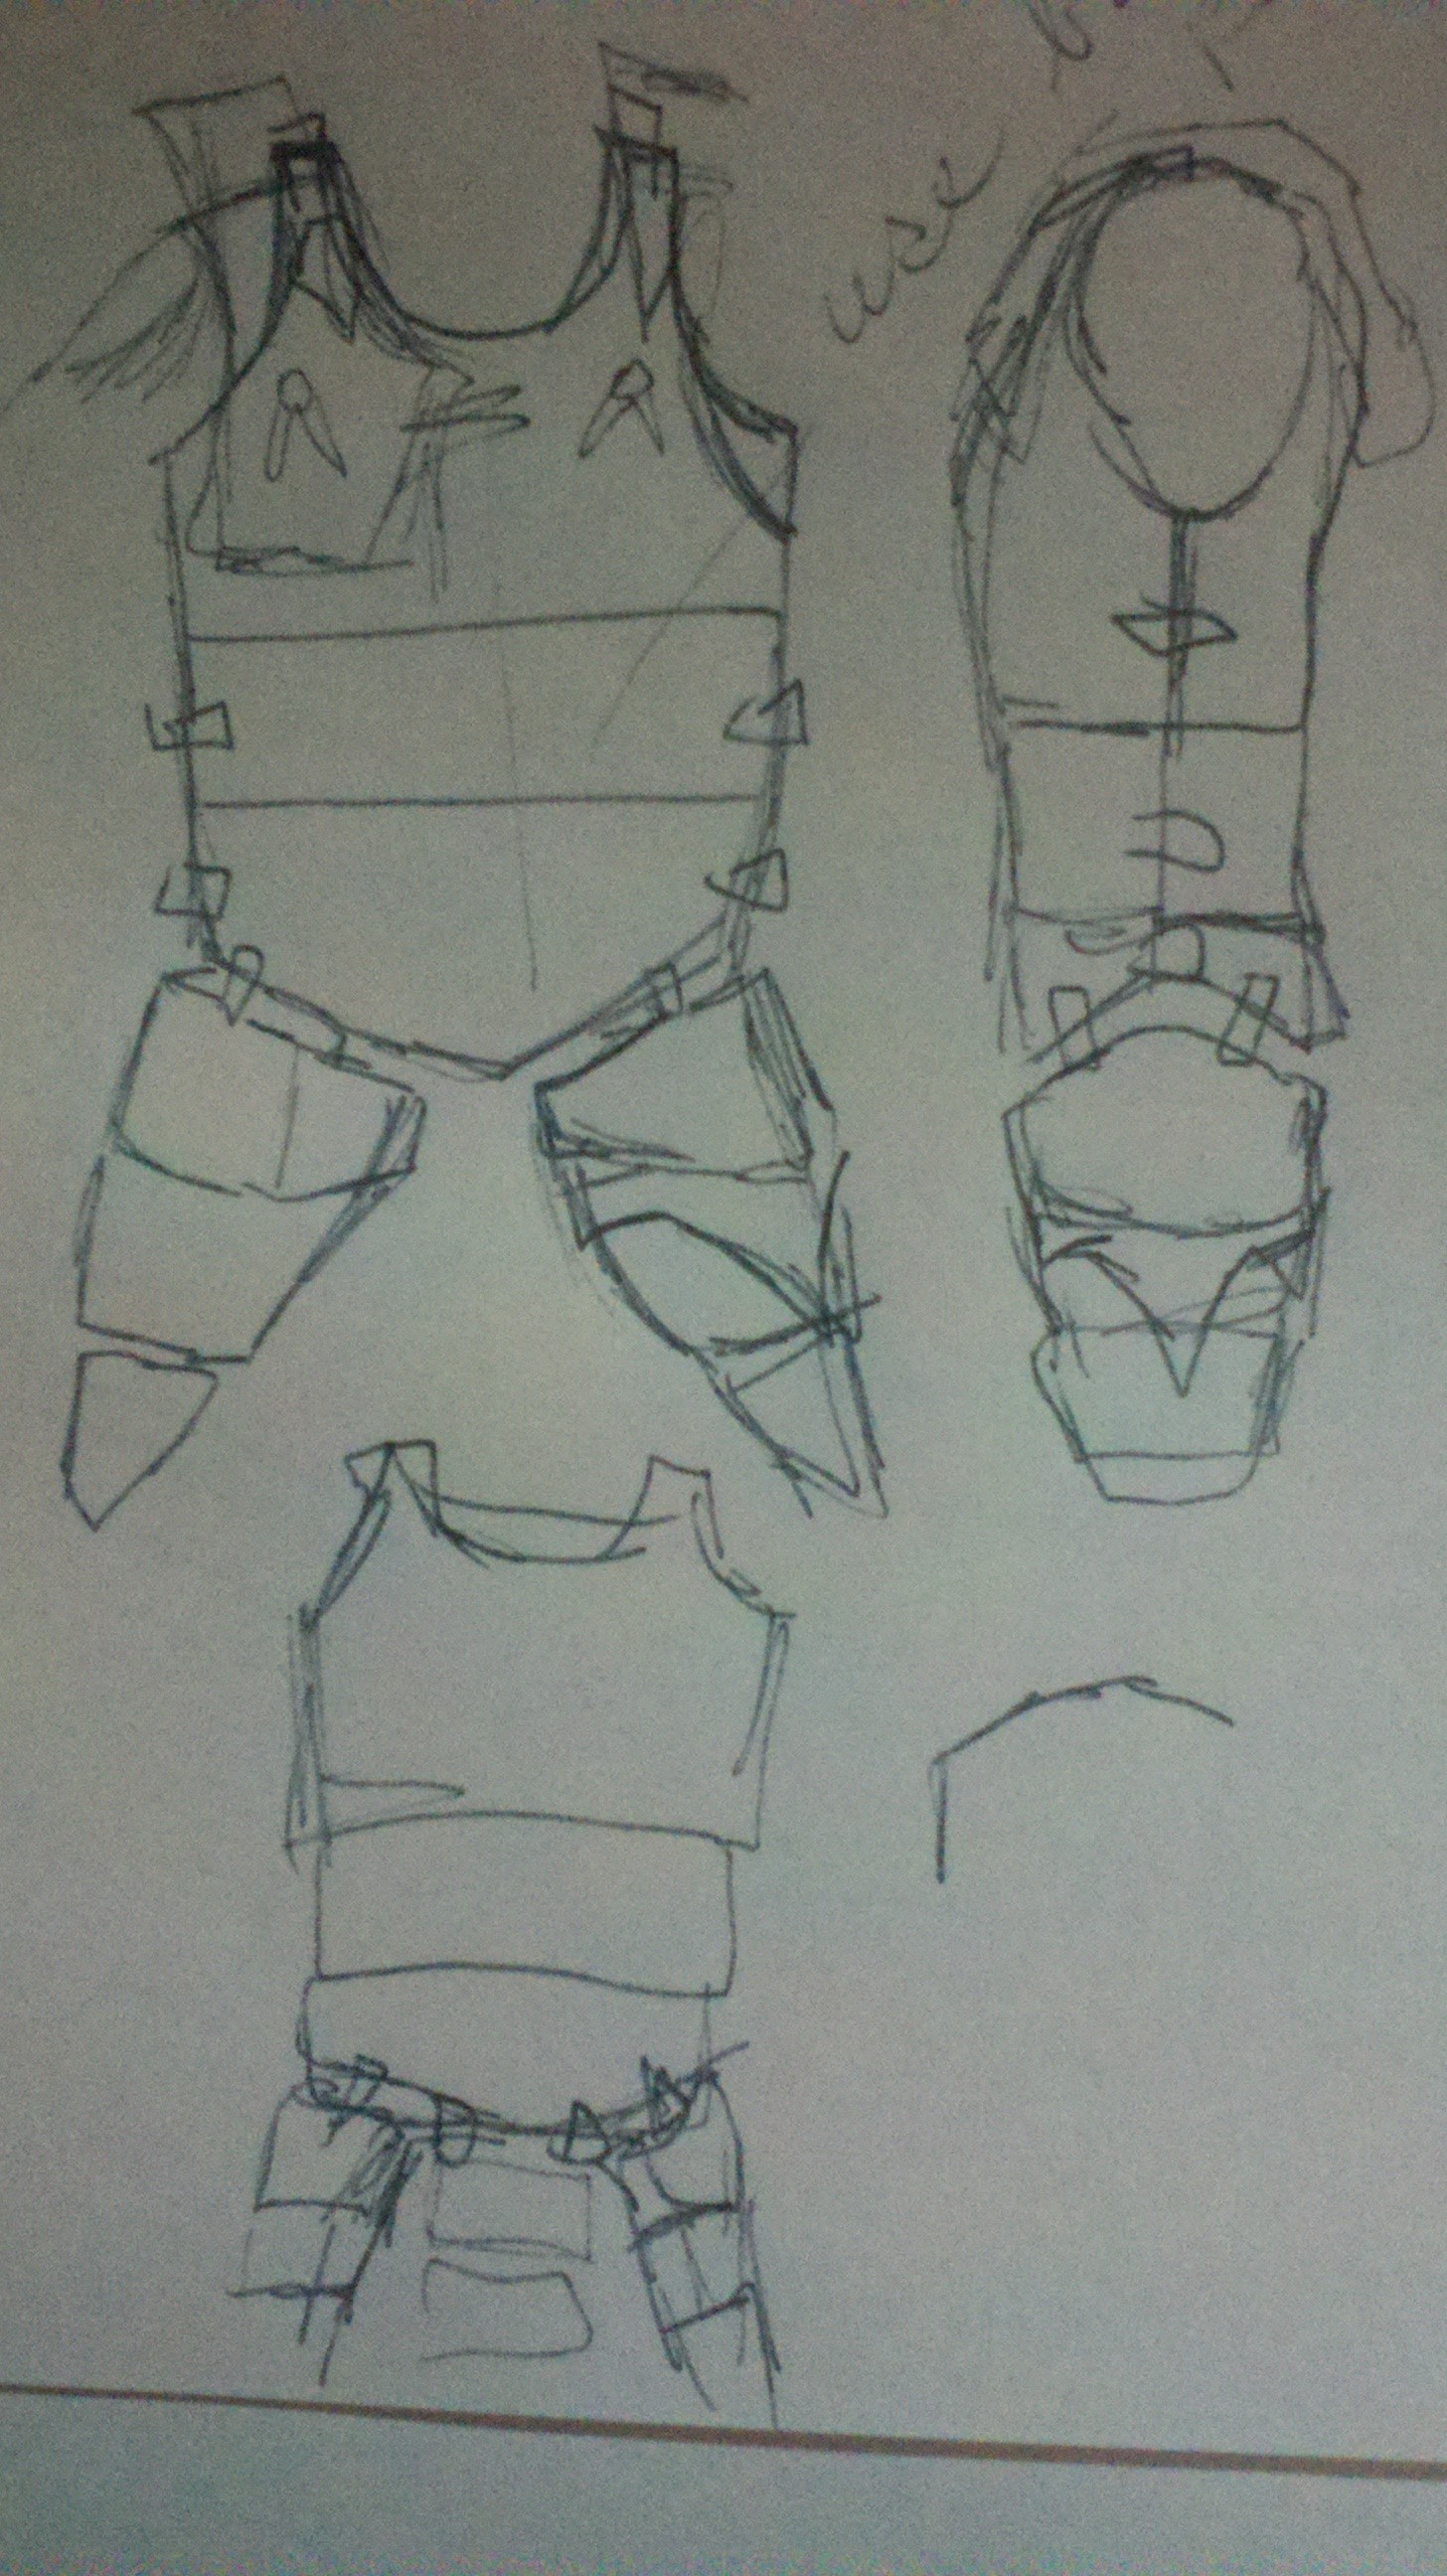
The curve of the barrel is a good starting point for body armor, but it does need refinement.
Using the oven is risky. This piece was accidentally in contact with one of the heating elements.
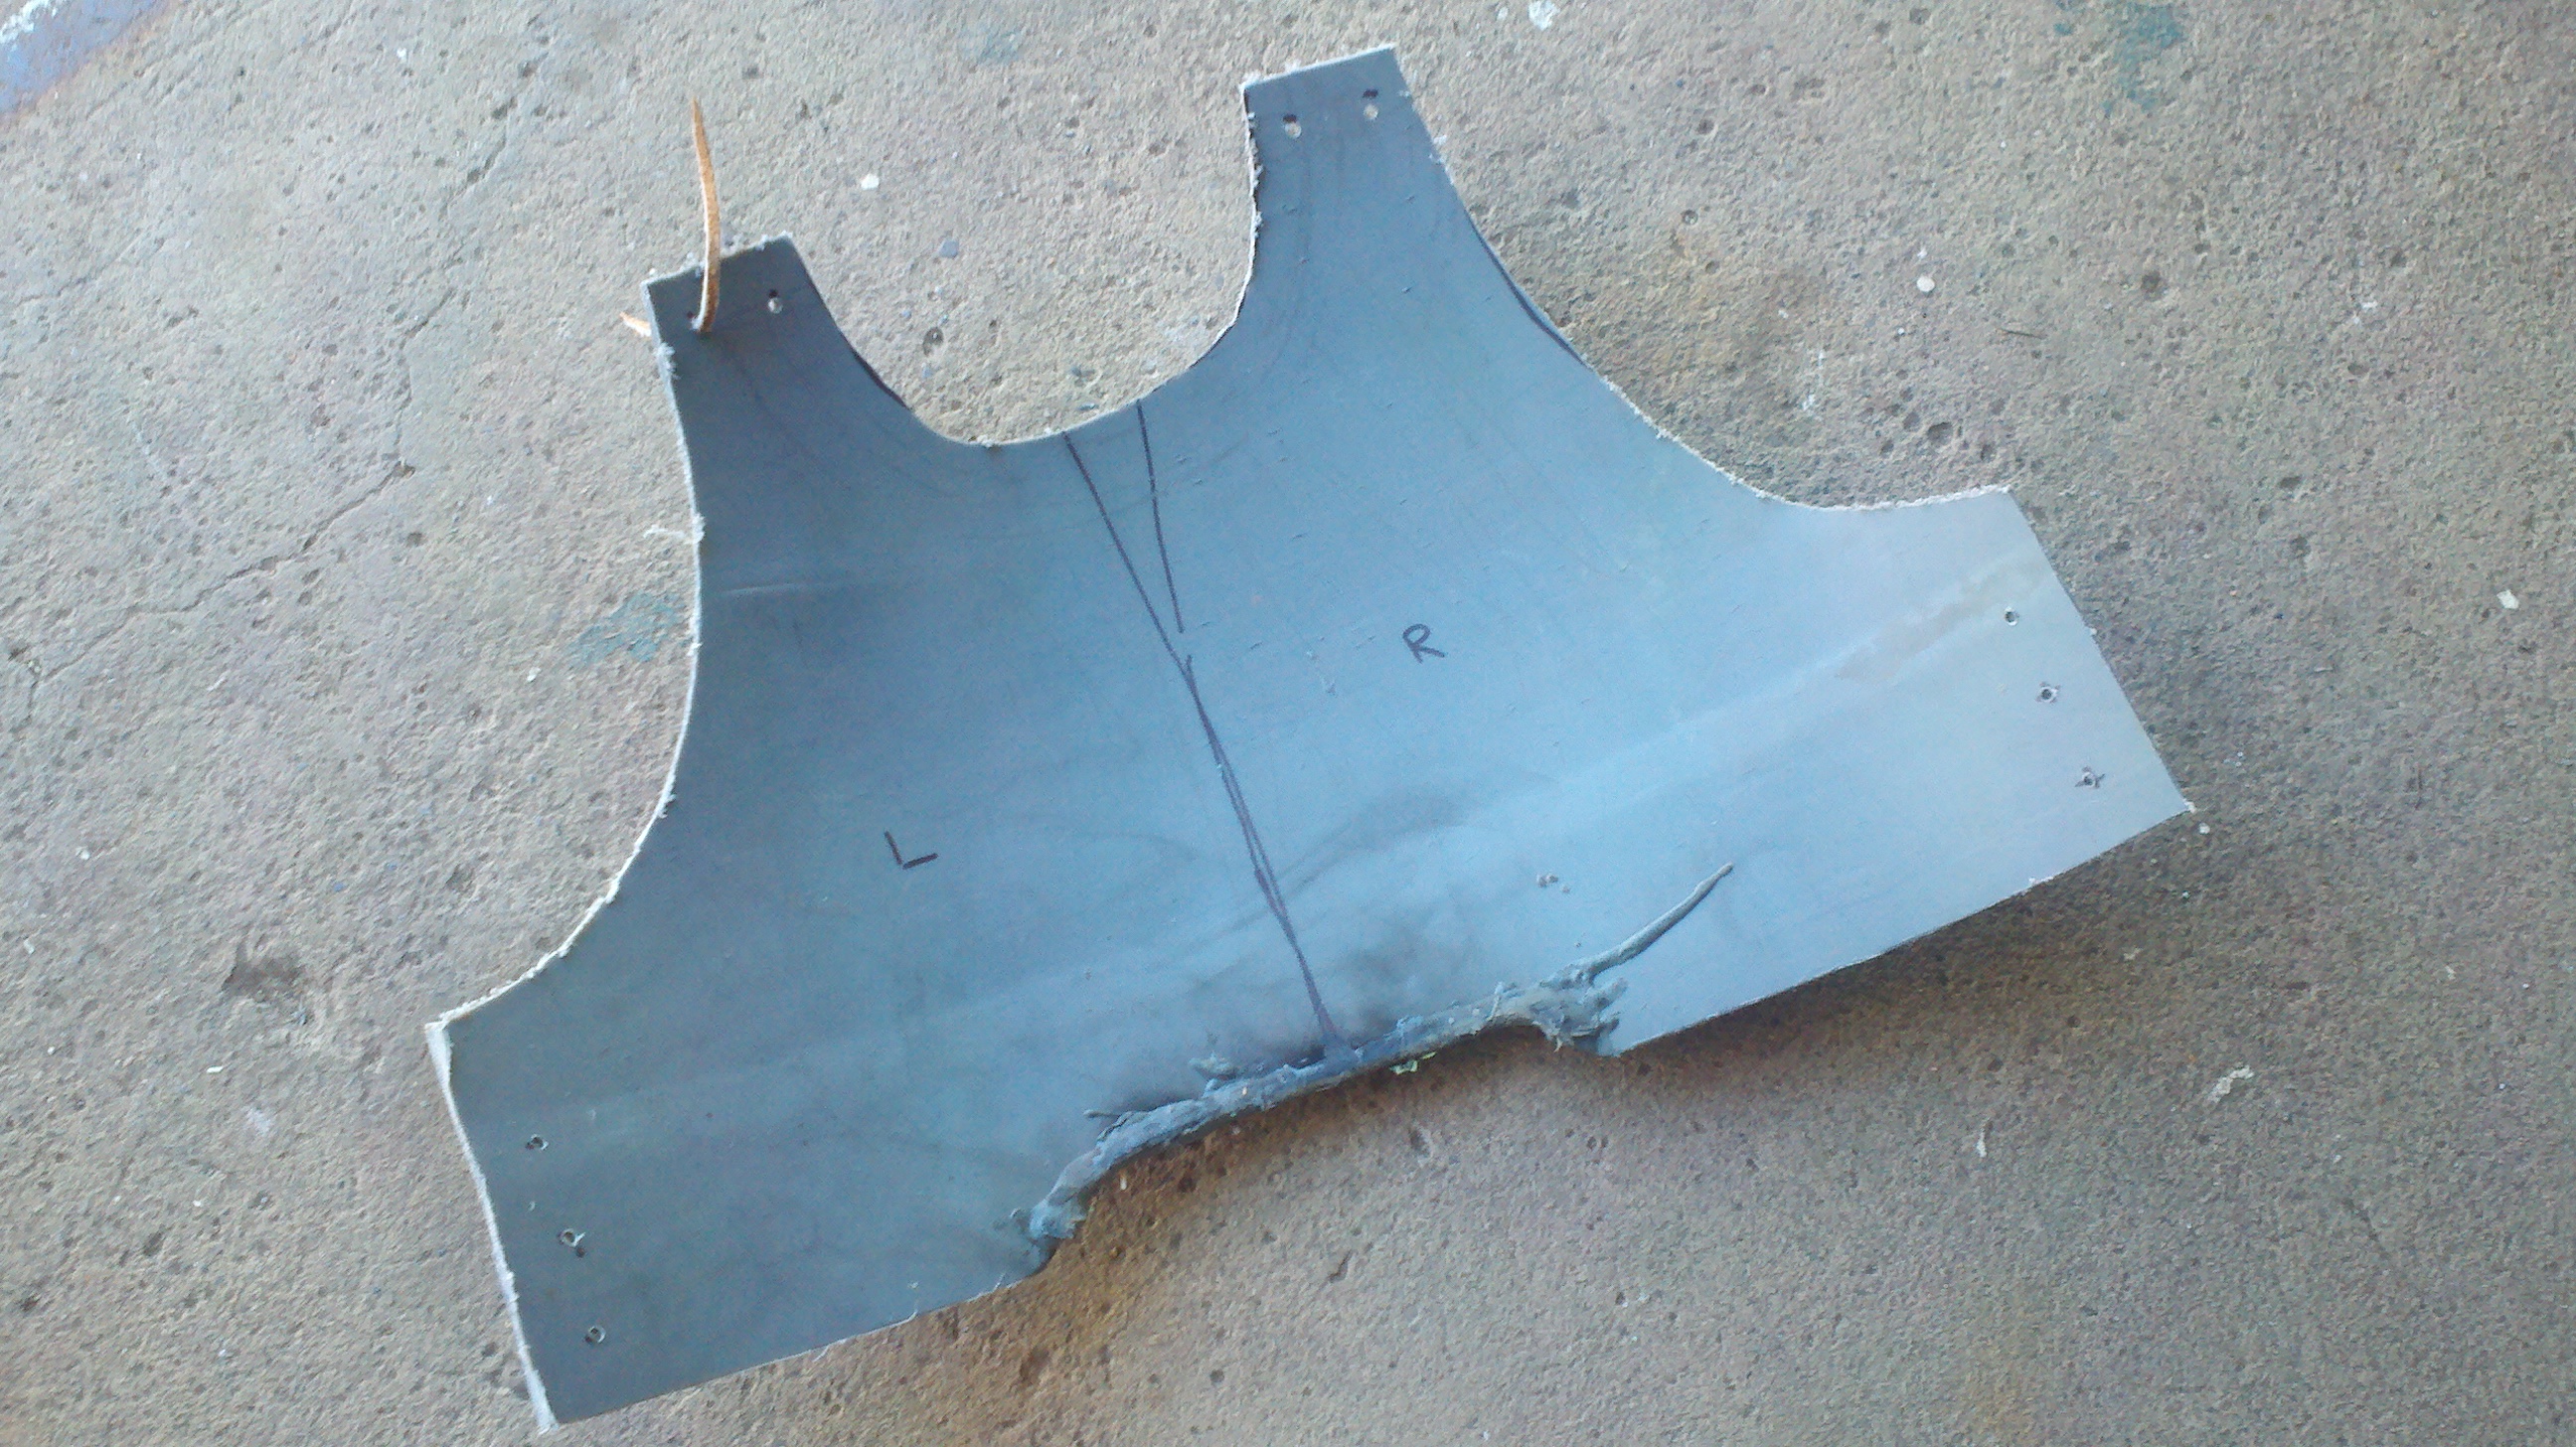
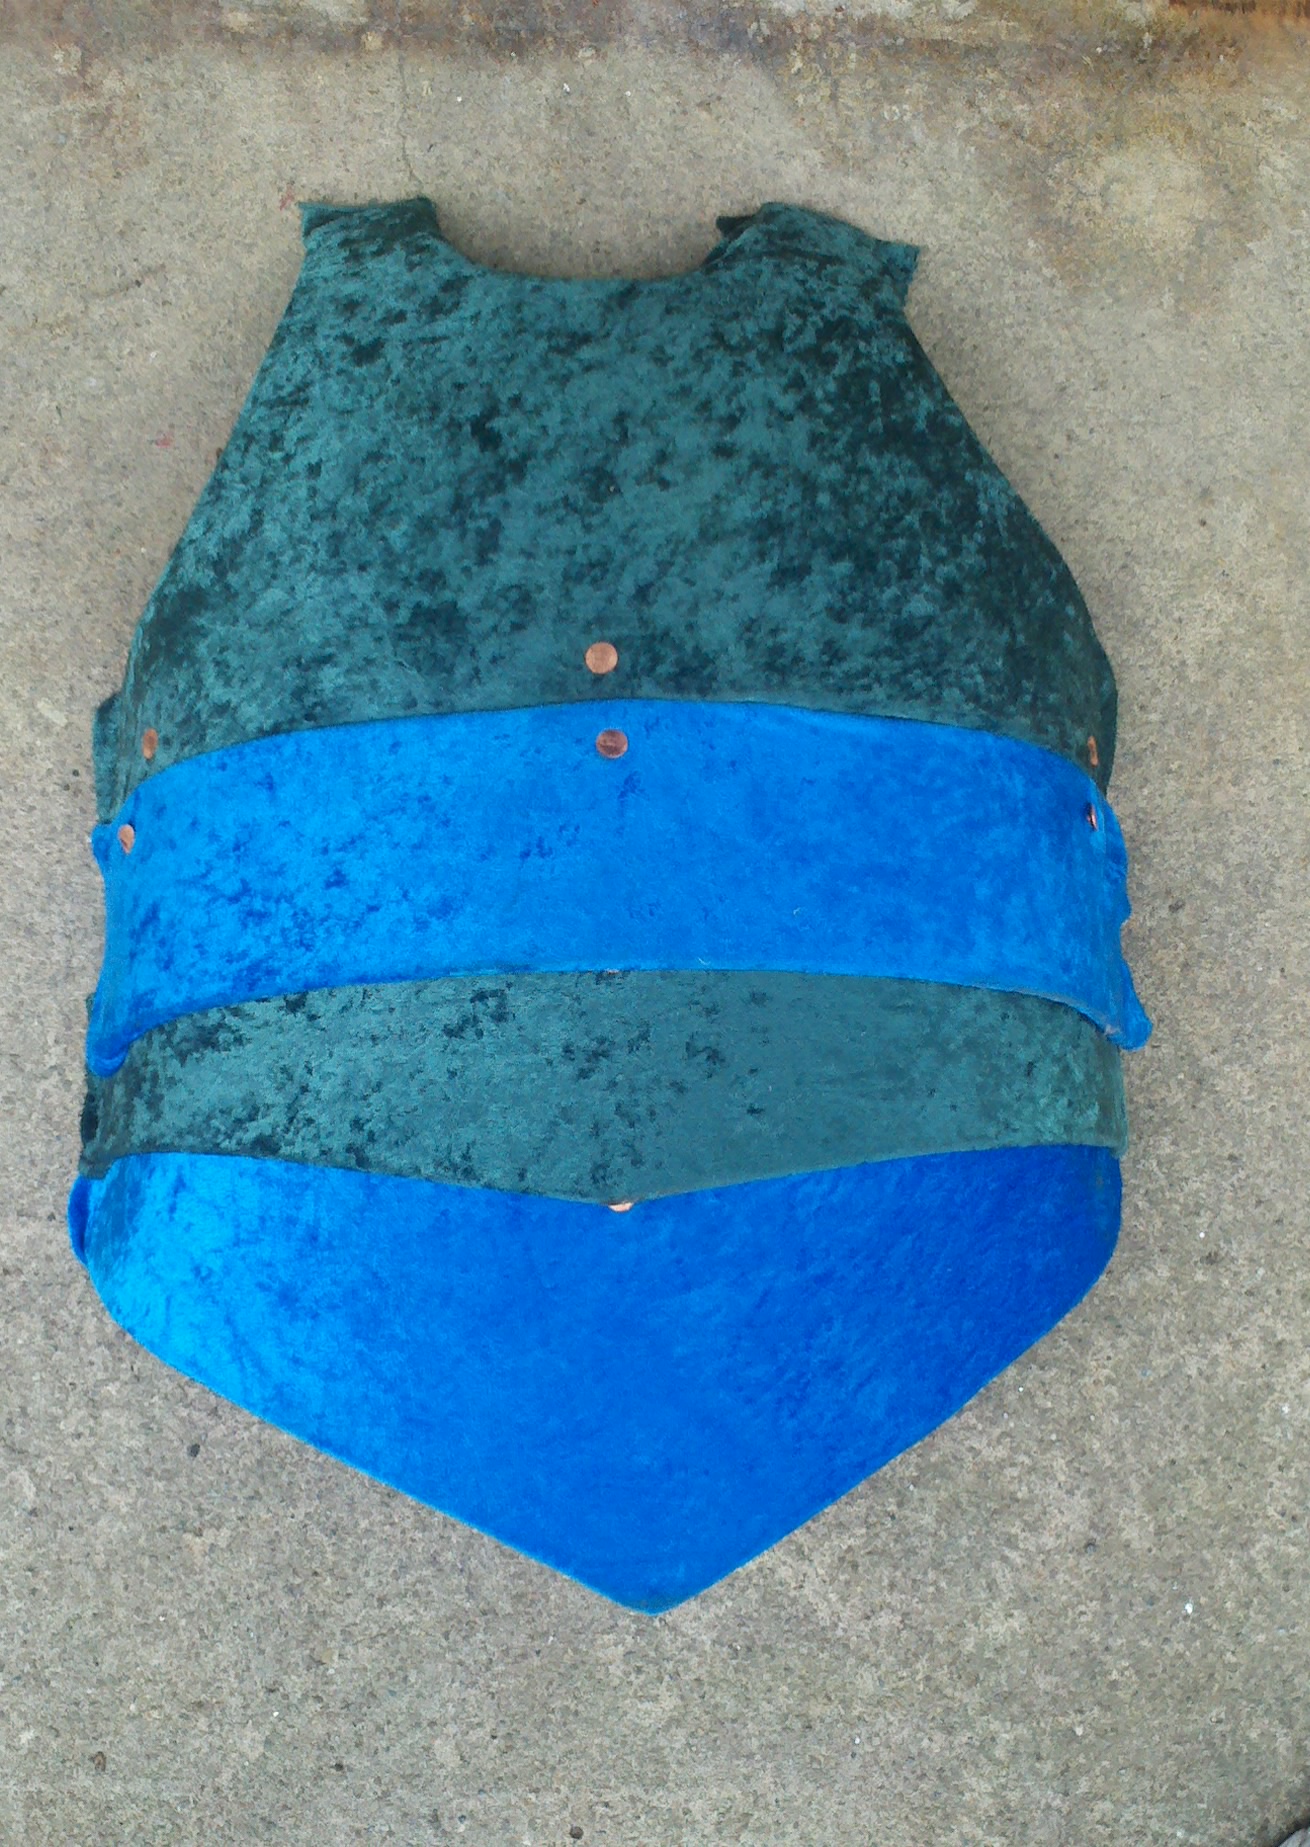
I wound up adding a piece to the chest plate after cutting off the burnt bits. I covered the pieces with velvet, which was occasionally done in the 14th century. (Although, I admit, I don’t like how this came out.)
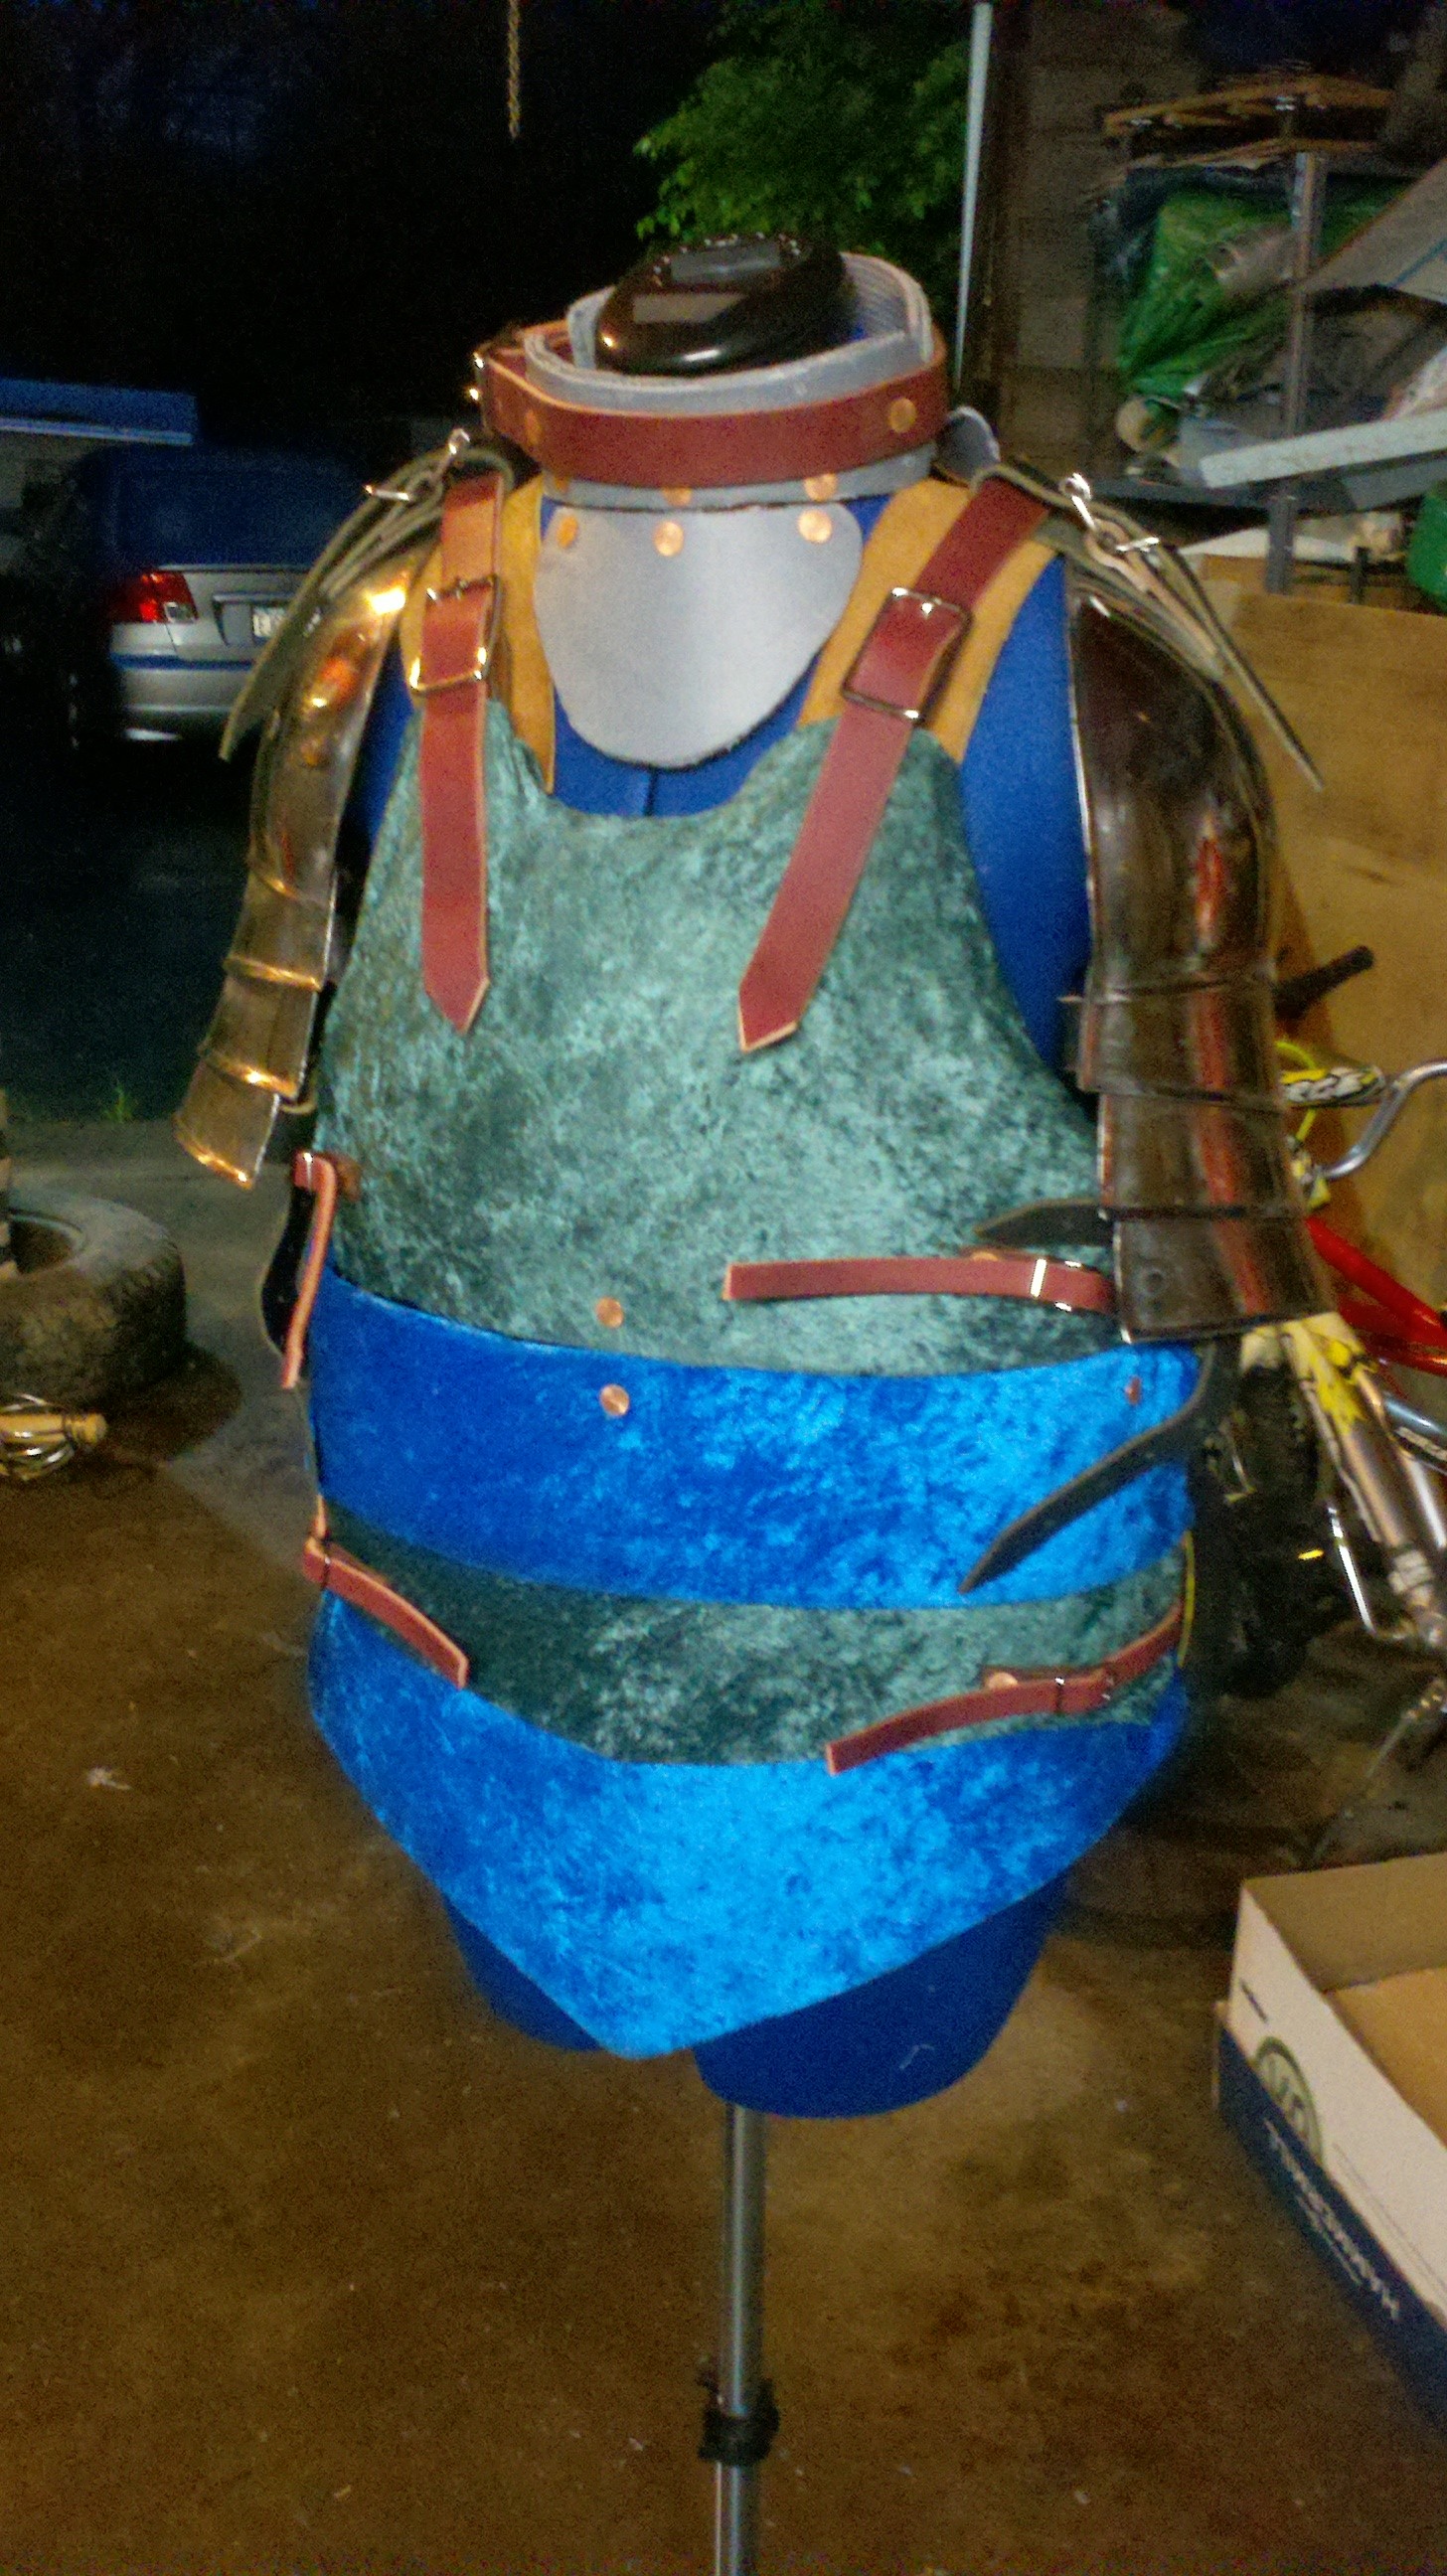
Then, with leather straps and buckles, it all gets put together.
While I used green and blue in the front, I chose to use black in the back.
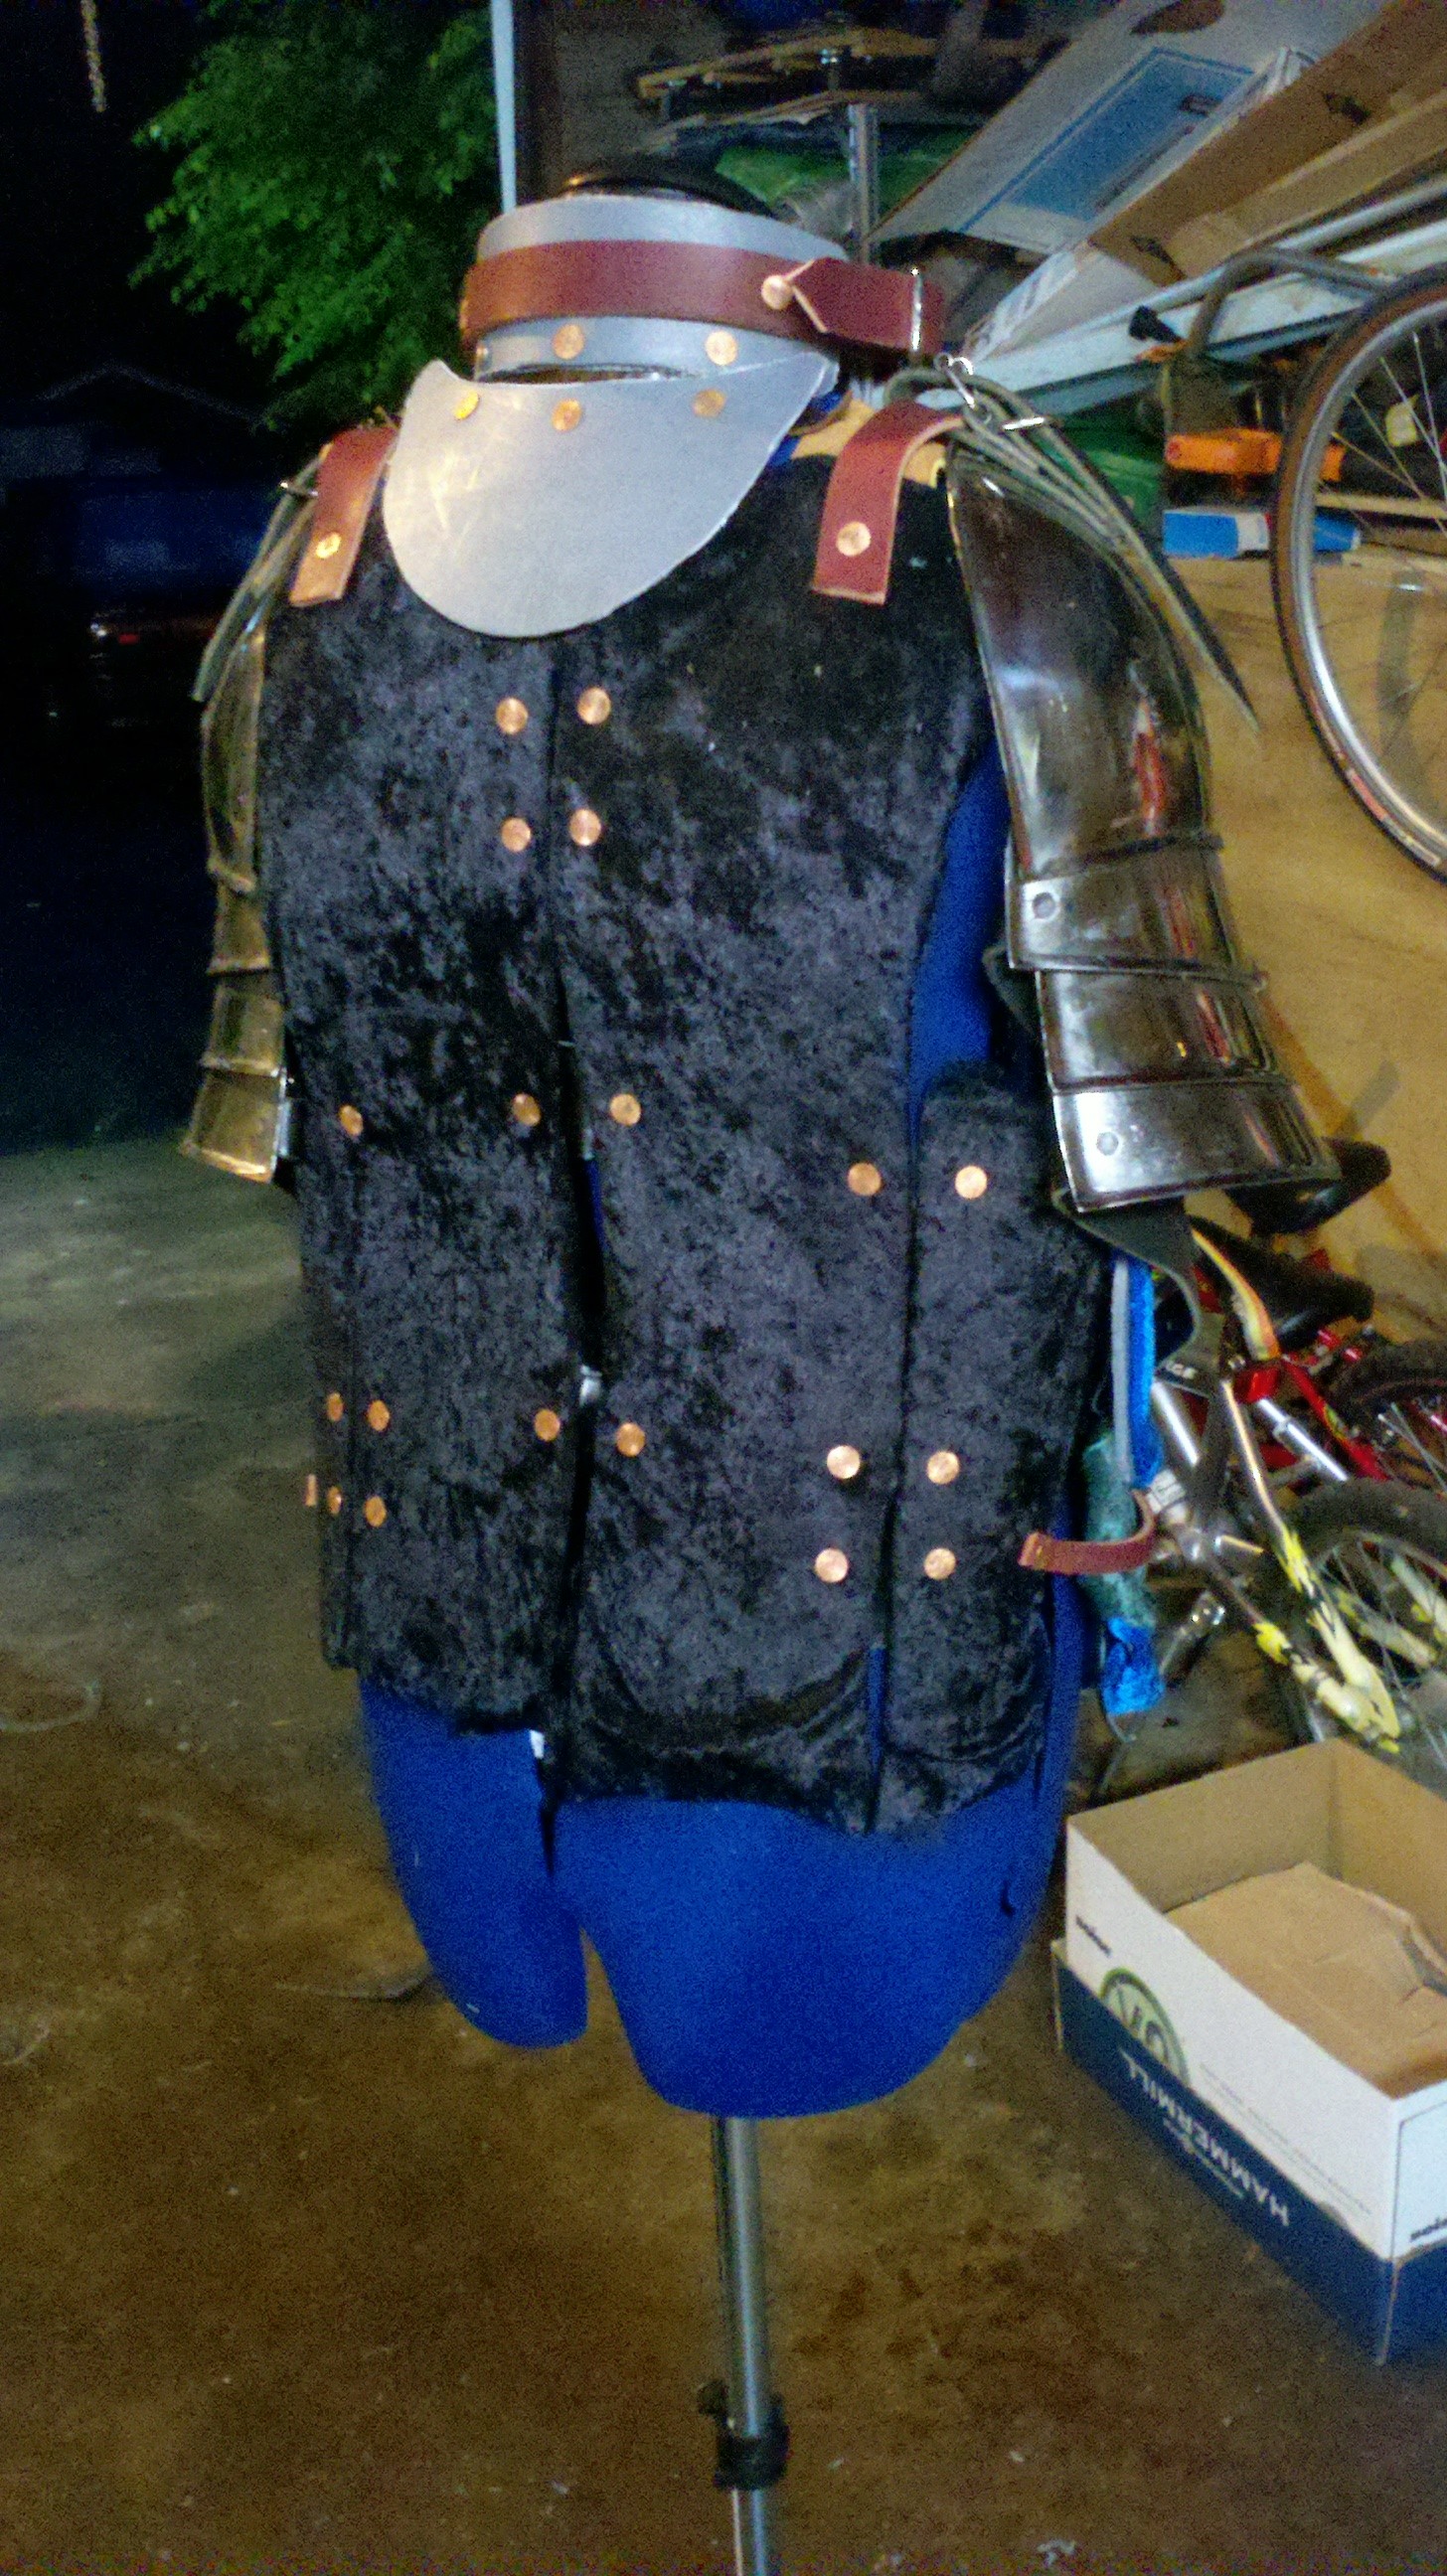
Parts of this armor have now been put into use, specifically the gorget. I’m not really all that happy with how the body armor came out, but I can still fiddle with it. I need to create shoulder protection (pauldrons), and also work on pieces to hang over my hips (tassets) for some additional protection. But I’m getting there!
Of course, as much fun as this is, I really want to get a forge and start working with metal. I’m a little strange, aren’t I?

this is Awesome
LikeLike