Scientist (Paleontology, Geochemistry, Geology); Writer (Speculative and Science Fiction, plus technical and non-technical Science); Mom to great boy on the Autism spectrum; possessor of too many hobbies.
The Earth’s core is composed of two parts, the liquid (molten) outer core and the solid inner core. The inner core spins while floating in the outer core in the same direction, but not necessarily at the same speed, as the rest of the Earth.
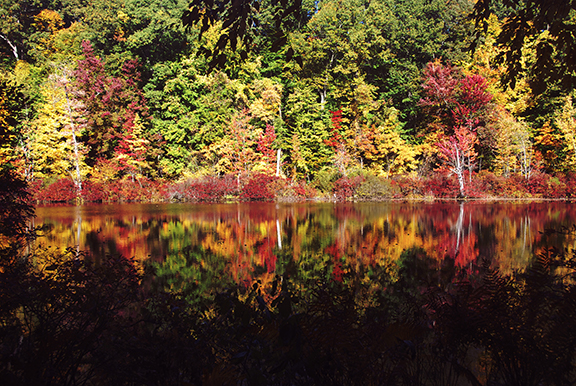
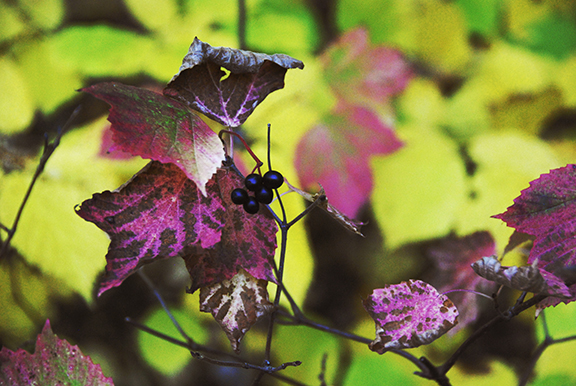
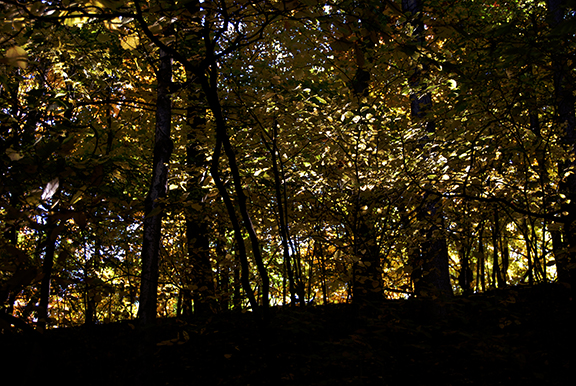
Today was a quick trip to Mendon Ponds Park, south of Rochester, NY to capture some images of the early fall colors. And do a little scoping out of potential places for a family photoshoot.
In the previous post, I explained how teeth grow. Now I’m going to get into the details of how we collect tooth enamel samples for isotopic analysis.
My home workstation for sampling tooth enamel
What we need is powdered enamel. The best way to get this is by drilling. With a dental drill.
The molar of a bighorn sheep that I’ve been sampling
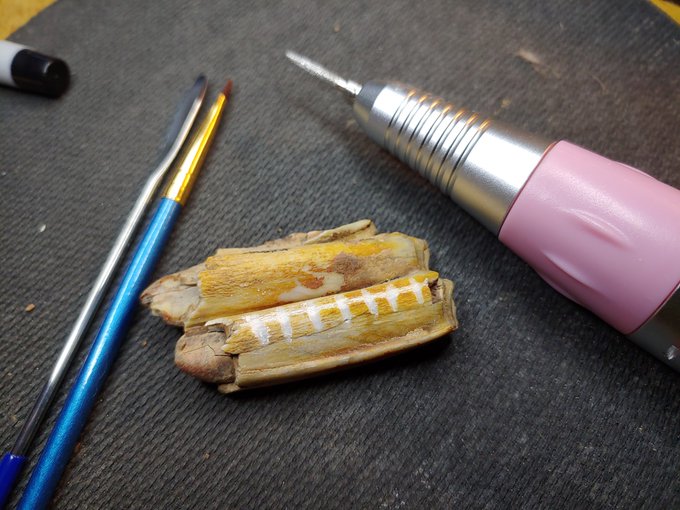
Copious notes are essential. This is tooth enamel from the incisor of a giant rodent – thankfully extinct – from Uruguay. Its tooth was about one in wide!
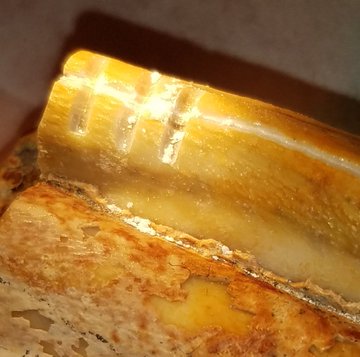
One of the greatest challenges we have is that we must only collect the tooth enamel and none of the underlying dentine. Sometimes it’s hard to tell if you’ve drilled too deep.
I’ve drilled the tooth now, and the resultant powder is sitting in the new groove.
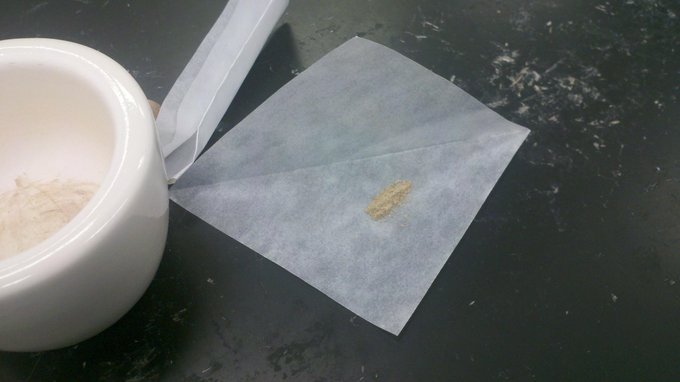
It doesn’t take much powder to get an analysis, which is good because we don’t get a lot when we drill in this way. The best way to collect the powder that we drill off is to let it fall onto a sheet of weighing paper, and then pour it off into a tiny vial.
This is a very large powder sample on a 3 inch by 3 inch sheet of weighing paper. Samples usually aren’t nearly this big.
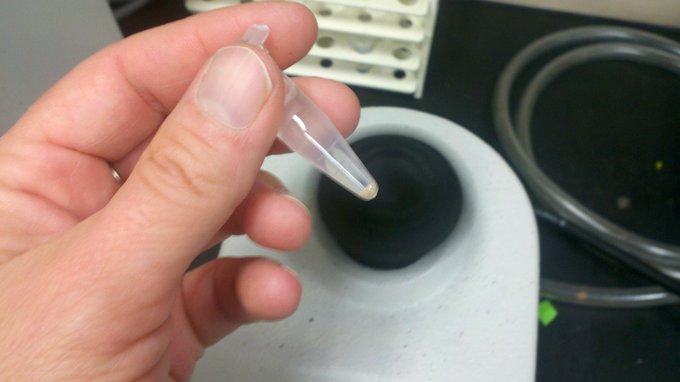
The typical size of a powdered enamel sample in this small vial.
This process requires tons of patience. It’s possible to get as many as 20 samples from a single tooth. But for most teeth we usually only get four or five.
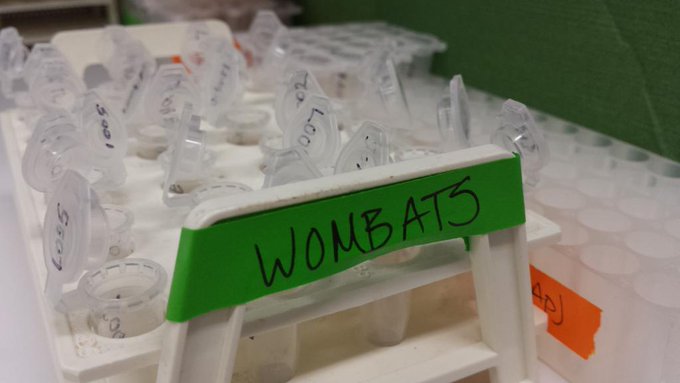
Collected samples can be stored in a rack. There was one time I worked with fossil wombats from Australia
It is an interesting process to collect the tooth enamel for analysis. It certainly gives me more appreciation for dentists (even if I still hate going for a cleaning).
Here’s something that not too many ‘traditional’ chemists have to do, but geochemists have to do all the time. You can’t very easily just stick a rock into a mass spectrometer and take a geochemical measurement. Usually, the rock or mineral (enamel, in this case) has to be powdered first.
In this post, I’ll mostly be using tweets to illustrate the collection of powdered tooth mineral. These powders will have to go through a chemical pretreatment which I will describing in a future note. These particular samples later went through a second chemical procedure that (thankfully) we don’t need for this study.
Fish scales and teeth both have ‘enamel.’ The enamel isn’t exactly the same, but it is still a calcium phosphate and the procedures are the same whether it’s a tooth or a scale. For these particular samples, grinding with a mortar and pestle was all we needed to get a sample. Sometimes, we need a dental drill! I’ll save that for a later post too!
Part of this project is gathering the funds needed to perform the necessary chemical analyses.
The other part is gathering jaw bones from far and wide (only legally, of course), so that we have a large, statistically significant, sample size.
If you have a jaw you’ve found, or some teeth, or something you think we’d be interested in, here’s how to get it to us!
How to send jaws and teeth for analysis
1) Find a jaw.
It could be of anything. It’s not your job to figure that out, but if you happen to know what it is, then all the better.
Jaw requirements: The jaw must have teeth, preferably incisors and some of the large teeth in the back. We recognize that it is difficult to know which cheek teeth are present. We’ll figure that out.
2) Take a picture of the jaw where you found it
..if you can and if you happen to have a camera. Cell phone pics are acceptable. These may be emailed to jawoflife548@gmail.com
3) Collect the jaw or the teeth from the jaw.
In many cases, the simplest thing to do is pack up the whole jaw, but that isn’t always possible. Perhaps the animal was very large or there was just a wee bit too much flesh on the jaw. (The Post Office doesn’t like shipping stinky things.) In that case, extracting the teeth is fine, assuming you feel comfortable doing so. Sometimes the teeth loose and can just be wiggled out. Sometimes you need a hammer. In instances when you choose to ship isolated teeth, we would be grateful if you could number the teeth in the order that they were in the jaw. It doesn’t matter which end (molars or incisors) you start numbering, as long as we know what order they’re in.
4) Package the jaw or teeth for shipping.
Wrap the jaw or the isolated teeth each in toilet paper (we call it “paleo tissue” in the biz), then put everything into a ziplock bag. All this can go into an appropriately sized box or a padded envelope.
5) Provide the information below.
6) Ship the jaw and the form to us!
Send packages to Jaws of Life Project, Attn: Penny Higgins, 6606 E Townline Rd, Williamson, NY 14589
Include the following information on a separate sheet of paper with the jaws or teeth you’re shipping.
Your name:
This doesn’t need to be your legal name, we’d just like to know who to thank. Make a note if you do not want us to refer to you by name in any coming blog posts or other outreach materials. We’ll happily call you an anonymous donor.
Your email:
Optional – but we’ll add you to the list and send updates! Also, if we have any questions, we can contact you. We will not share this email outside of this project.
Location jaw was found:
Please describe the geographic area where you found this. Latitude and Longitude are acceptable as are verbal descriptions such as “My back yard in Manhattan,” “Grant Parish, Lousiana,” and “Uinta Basin, Utah.” Mammals move around, so within a few miles is ok.
How you found the jaw:
Was it buried? Sitting in the open? In a bird’s nest? Road kill (Hey! It’s legit! Did you know I once saw a living armadillo?)? Was it a hunting trophy your uncle has and you don’t think he’ll miss the jaw?
A description of the jaw:
Big or small? Was it broken? In a pile with other bones? You can include a sketch if you’re so inclined. Sketching is an important part of science, so give it a whirl! In case the sample gets separated from this form, a description would be helpful to get them back together! Email photos to jawoflife548@gmail.com
Anything else we need to know?
Maybe you found this in an abandoned house and you don’t know where it came from, but we can still use it for this study! Maybe you picked it up 30 years ago from a place that has since been developed or ravaged by wild fires.
If you have questions, please email us at the Jaws of Life Project: jawoflife548@gmail.com
As we describe this project, we refer to the “chemistry” of tooth enamel. Chemistry can mean a lot of things, so what does it mean in this context?
Let’s start with tooth enamel.
Tooth enamel is composed of a mineral called apatite. I spelled that correctely. Apatite is the mineral – a geology thing – whereas appetite is the gee-I-want-to-eat thing that we’re more familiar with.
Apatite is a phosphate mineral, meaning that it has in its matrix the phosphate unit, PO<sub>4</sub>. Its chemical formula is written as: Ca<sub>10</sub>(PO<sub>4</sub>)<sub>6</sub>(OH,F,Cl)<sub>2</sub>
Apatite is really a mineral group that always contains calcium (Ca) and phosphate, and may also contain the hydroxyl group (OH), fluorine (F), and chlorine (Cl). To keep ourselves sane, I just refer to the mineral in teeth (and in bones) as bioapatite.
The chemistry we are looking at is the phosphate unit, and things that substitute in and replace the phosphate unit, especially carbonate, CO<sub>3</sub>
Oxygen, in both the carbonate and the phosphate components of enamel comes mostly from the water that the animal ingested. That water reflects the environment (temperature, rainfall, humidity) in which the animal lived. Carbon, found only in carbonate, comes from the foods that the animal ate.
Because tooth enamel is solid mineral, once its formed, the chemical signature of the oxygen and carbon are fused in and remain unchanged through the life of the animal and usually even after its fossilized. Bones have bioapatite in them, but also have lots of organic components, which is why they can grow and heal. This also means that the chemical signature of oxygen and carbon in bones are usually altered over the course of the animal’s life and during fossilization.
The way we get information about water and diet from oxygen and carbon is by measuring the relative amounts of the different kinds of oxygen and carbon in the apatite.
Whoa turbo. Did you say different kinds of carbon and oxygen?
Yes, that’s exactly what I said. And you probably know this already, just didn’t know you knew.
There’s this word out there that strikes fear into many. The word is “isotope.”
No, you don’t need lead shielding. Every atom of oxygen and carbon or any other element is an isotope. It’s just that some are radioactive and some aren’t. You probably know about carbon-14. It’s radioactive and used for ‘carbon dating.’
What you probably don’t know is that there is carbon-12 and carbon-13 as well. These are stable isotopes. These aren’t radioactive and compose more than 99% of the carbon in the universe.
Oxygen also has three isotopes: oxygen-16, oxygen-17, and oxygen-18. They’re all stable.
In our analyses, we measure the relative amounts of oxygen-16 to oxygen-18 (or carbon-12 to carbon-13). The relative amounts of the isotopes of oxygen tell us about the evaporation of water, which relates to temperature. The water that’s evaporating is the water in ponds, lakes, and streams from which the animal was drinking.
We can measure the oxygen amounts from both the phosphate and the carbonate, but the carbonate is tons easier and safer and gives us information about the relative amounts of carbon-12 and carbon-13.
The carbon in tooth enamel comes from the diet of the animal and ultimately from the plants that are eaten. The relative amounts of carbon-12 and carbon-13 in plants are mostly dictated by the plant’s metabolism, and by both aridity and tree cover.
When we analyse both carbon and oxygen together, we can learn a lot about an enviroment.
And now we’re back to the point of this project. The ‘best’ tooth to use is the third molar, but we aren’t sure if other teeth in the jaw can provide an adequate representation of the animal’s environment. By analyzing third molars and incisors (and other teeth) from a single jaw, we can be confident that all the teeth grew in the same environment, so arguably, they should contain the same amounts of carbon and oxygen.
But there are reasons why different teeth might differ in their chemistry. That feels like another post..
How do we know what teeth we have when we find a jaw or an isolated tooth?
Let’s start with a simple, yet common case: The lower jaw of a deer or sheep. For those of you that spend much time hiking, deer jaws and bones are fairly easy to find. These jaws can be valuable for a study like this because they are so common and don’t really have a lot of value. People usually want skulls to put on their shelves, not jaw fragments with a couple of teeth.
What would you expect to find?
For most plant-eating animals, you would expect five or six cheek teeth in the jaw. These are the heavy grinding teeth behind the canines. In herbavores like deer and horses, there usually isn’t a canine – or at least not a big one. There is, however, typically a gap between the cheek teeth and the incisors called the diastema. In a mature adult, there should be three molars and two or three premolars. If you count the cheek teeth, and there are fewer than six, it’s usually the third molar that’s missing. It generally hasn’t come in yet, even though the animal may already be able to reproduce.
Start with counting the cheek teeth. Also, check to see if there are any empty tooth sockets, which indicate missing teeth.
It’s often very helpful to start by looking at the teeth from the top. That is, looking down on the grinding, or occlusal, surface like in the photo below.
The jaw above had six teeth, three molars and three premolars. You can also see that the teeth are worn down a little from eating. Unworn (not chewed with) teeth appear bulbous, but these have flat surfaces and sharp edges. This was a mature adult and the tooth on the far left is the third molar.
Molars do not have baby teeth that fall out before they come in. So if you can see that there is a baby tooth, then the tooth you’re looking at is a premolar.
Molars also tend to be more complex than premolars. They have more cusps (bumps) and crests (sharp ridges) than the premolars. If you look at the deer above, you’ll see that the tooth on the far right (a premolar) is less complex than the tooth on the far left (a molar).
Here is the same teeth as the deer above, but from a fossil horse. This is a photograph of a cast. No fossils were harmed in the taking of this photograph.
The Mesohippus and the deer have the ‘W’-shape on each tooth in common. That is, there are two connected V-shaped crests on all the premolars and the first and second molars. These crests help cut up and grint the plants they eat.
If you count the crests, you’ll notice that the third molar has three connected V-shaped crests. This is another common characteristic of the third molar. It’s extra long.
The elk third molar in the photo above shows the three big V-shaped crests on the third molar. The V-shaped crests in the modern horse are a little less obvious then they are in deer and elk, which reflects their different dietary preferences, but there is no giant lobe (extra crest) on either of the molars already present in this jaw. (There’s a little knob on the back of the molars, but that will wear away pretty quickly once the horse’s other molars come in fully.)
But what if you don’t find the whole jaw. What if all you find is this?
The great thing about mammals is that we can often identify the species of the animal from an isolated tooth. This scenario is even better because we get two teeth!
If you look at the occlusal surface of the teeth, you immediately see that the tooth closer to the mouth as two V-shaped crests whereas the furthest back tooth has two big V-shaped crests and a pronounced almost-V-shaped lobe at the back. This is the third molar.
This jaw, with only two teeth, and be used for chemical studies using current thinking because it has a very lovely third molar to work with. This jaw is also helpful for this project because we can compare what we learn from the third molar with what we measure from the second molar.
Looking for that third lobe can help us when all we have is a pile of isolated teeth (which is unfortunately a fairly common scenario). It can be very challenging, especially in horses, to take an isolated tooth and know what tooth position it is, with the third molar being a notable exception.
This is great if we limit ourselves to third molars, but there aren’t always third molars present. And that’s why we need to systematically compare the results and interpretations based on analysis of the third molar with those from the other teeth. One way or another, we need to know if we can use other teeth and get similar results especially for those situations when third molars simply aren’t present.
This project was born from the practical need to be able to maximize our ability to learn about past environments using the geochemistry of fossil teeth. There have been a few studies, some published and some student projects, that have examined whole jaws, but nothing sufficiently systematic or with enough samples that we can apply statistical analysis. And in most cases, the focus is on the cheek teeth and does not include the incisors. Such studies are interesting and worthwhile and I’ll be outlining some of them here in the lab notes. They are an important component of doing this project in the most objective and usable way possible.
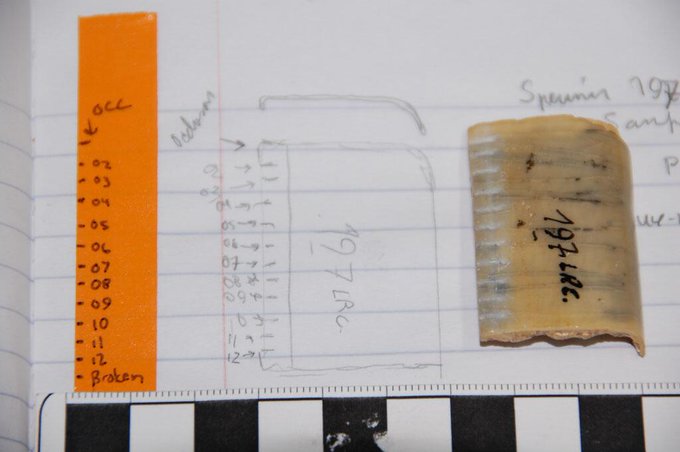
Some specimens and laboratory notes from pronghorn “antelope” teeth collected from a jaw found in the Hanna Basin of Wyoming.
I’ve worked in many places globally, with most of my research taking place in the Rocky Mountains region of the United States. And I’ve never NOT picked up skulls whenever I found them. These specimens represent a skull I collected sometime in the last century (wink) when I was working on my PhD (studying 60 million year old mammals in Wyoming).
Even though I collected the skull and jaw for the pronghorn pictured above 20+ years ago, this is still a perfect specimen for use in this project. Most importantly, I know that both teeth came from the same jaw (I removed them myself), which means I can directly compare the chemistry of the teeth and understand where they are similar and where they are different. With the additional knowledge of its age (modern) and where it came from (the Hanna Basin), data collected from this jaw can be used in related studies of how environment is reflected in tooth chemistry.
In 2019, I collected bulk samples from both the third molar and the incisor and analysed them. Above are my notes from when I collected the samples.
So what is all that nonsense written there?
“Rm3” and “Ri1” refer to the exact tooth position. These are the right lower third molar and the right lower first incisor. R (or L) indicates if it came from the right or left side of the jaw. The M and I indicate the tooth positions (Molar, Incisor, Canine, and Premolar). The lower case “m” and “i” indicate these teeth came from the lower jaw.
“PH-SIR-19-53” and “PH-SIR-19-54” are numbers that I assigned to the powdered samples when I collected them and put them into tiny vials. The PH is for me, Penny Higgins. SIR stands for “Stable Isotope Ratios” which is what I use when I’m collecting a sample that doesn’t belong to any particular project. Samples collected specifically for this project will be denoted “JP” for Jaw Prawject, so I can remember why I collected the sample. “19” stands for the year that I collected the sample, in this case 2019. 53 and 54 are for the number of samples I collected that year. So PH-SIR-19-54 is the 54th sample that I collected in 2019 that was not associated with any particular project. I collected these samples because I was already thinking about this research question, but hadn’t framed it into a formal project yet.
The term “bulk” written beside the sample number tells me that I collected a bulk sample from the tooth. That is, I collected only one sample representing an average of the entire tooth.
I always include a drawing of the specimen before I sample it for two reasons. One is so that I can make note of where I took the sample. It’s not always obvious when your finished, so it’s helpful to have a drawing. Two is so that I have a visual record of what the tooth looked like before sampling. Sometimes teeth shatter during sampling. And occasionally a tooth gets misplaced. If they’re not labeled, sometimes the only way to connect a sample to its tooth is through this drawing.
The moral of that story is to not be afraid to draw in your notes, even if you think your draawings are bad. But I digress.
Beneath my drawing of the Rm3 is says (sloppily) “broken & glued”. This is important for me to make note of, because I might have accidentally included some of the glue in with the enamel sample, which could affect the chemical analysis results.
In pen beneath each tooth is written a number that starts with “G-“. The G- numbers are assigned to the samples when they’re analyzed in the lab where I ran them. If I want to connect the results of the chemical analysis with the samples and ultimately back to the teeth, I have to know the G-numbers.
OK Penny. That’s great. So…? What did you learn?
We are measuring the relative amounts of stable (i.e. not radioactive) isotopes of carbon and oxygen in the tooth enamel. From the analysis, we get what are called “delta values,” one for carbon (δ13C) and one for oxygen (δ18O). The units of delta values is “per mil” and is denoted as ‰. In a future post, I’ll explain what this is about. For the moment, it is sufficient to say that we hope the delta values for carbon and oxygen are the same for the incisor and the molar. “The same” means that the values would be within 0.2‰ of each other.
Here are the results. I was able to analyze the molar sample once and the incisor sample twice:
What we see is that where we analyzed the same sample (the Ri1) twice, we got the same answer for both δ13C and δ18O. But, between the two teeth, the results are very different, especially for δ18O.
Rats. I guess my hypotheses that they’d be the same is wrong. Phooey.
This is science. We don’t fling our hands in the air and quit. There are multitudes of reasons why this may be the case. δ18O is affected by season. What if the teeth grew at different times of the year? What if the glue on the Rm3 messed everything up? What if the analysis for the Rm3 was bad? We only ran it once before we ran out of sample, so we can’t be sure.
This is where you come in! We need more samples. We need to run enough analyses to confidently draw any conclusions. I still have these teeth, so I can resample and run them again. Or we can run a whole bunch of pronghorn teeth. Or horse teeth. Or cattle teeth. Or badgers, because why not?
There are far more questions than answers right now. Your support of this project will help us answer some questions, and will help us ask better questions in the future!
I’m working on a project that was just launched on experiment.com. I refer to it as the Jaw Prawject or the Jaws of Life Project.
It’s a project to better understand how stable isotopes are affected by tooth position in mammal jaws. The goal is to determine if the dogma of only using the third molar for analysis is valid.